Building a Realistic Enterprise Level SOC LAB for Blue & Red Teamers - Part 1
Hey folks, I’ve always been fascinated by the idea of building my own Security Operations Center (SOC) lab at home — not just any lab, but one that brings together realistic enterprise segmentation, SIEM monitoring, VPN connectivity between two isolated hosts, high level network segmentation, and an external attacker simulation.
After countless trials, configurations, and creative tweaks using the resources I had (yep, two laptops and VMware!), I’ve finally built a fully functional lab that mimics real-world SOC environments. And the best part? It covers both the Blue Team (defensive) and Red Team (offensive) perspectives.
Let me walk you through it step-by-step:
What’s The Goal Here?
I wanted to:
- Learn and practice SOC Operations, Log analysis, and Incident response
- Simulate attacks from a Kali Linux Machine
- Monitor network logs with Splunk and Sysmon
- Explore Misconfigured Active Directory (Windows DC), Vulnerable Servers and a Segmented Zones
- Implement realistic network security layers like DMZ, LAN, SIEM and VPN access
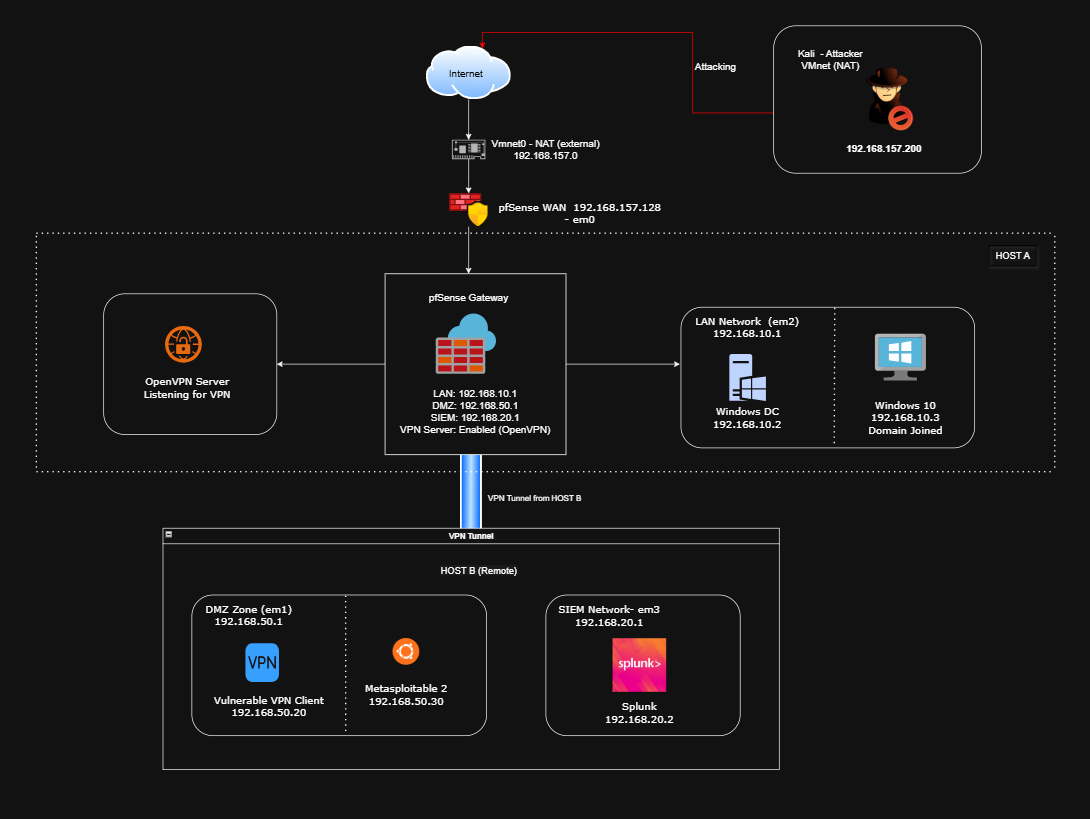
Here’s a rough High level Architecture:
Host A (Primary Lab Server)
This machine hosts the internal infrastructure and firewall:
- pfSense as the central firewall/router & OpenVPN server
- Windows Server 2022 as Domain Controller (AD, DNS, DHCP, CA)
- Windows 10 Client joined to the domain
- Kali Linux connected to the WAN (external attacker)
- Segmented virtual networks:
- DMZ (192.168.50.0/24) – Vulnerable services (Metasploitable)
- LAN (192.168.10.0/24) – AD, Client, Internal services
- SIEM (192.168.20.0/24) – Routed through VPN only
Host B (Remote Secondary Server/ SIEM Server)
This separate laptop runs:
- Splunk Enterprise in the SIEM network
- Metasploitable 2 VM
- Vulnerable Application Server
- VPN Client connecting securely to pfSense VPN on Host A
- Access to all networks (DMZ, LAN, SIEM) via the VPN tunnel
Tools & Tech Stacks
- VMware Workstation - https://www.vmware.com/products/desktop-hypervisor/workstation-and-fusion
- pfsense Firewall ISO - https://www.pfsense.org/download/)
- Windows Server 2022 ISO -https://www.microsoft.com/en-us/evalcenter/download-windows-server-2022
- Windows 10 ISO - https://www.microsoft.com/en-us/software-download/windows10
- Metasploitable 2 VM -https://docs.rapid7.com/metasploit/metasploitable-2/
- Splunk - download - https://www.splunk.com/en_us/download.html
- Ubuntu Server with Vulnerable application installed - https://ubuntu.com/download/server
- Download Kali Linux - https://www.kali.org/get-kali/#kali-platforms
- Metasploitable 2 -https://docs.rapid7.com/metasploit/metasploitable-2/
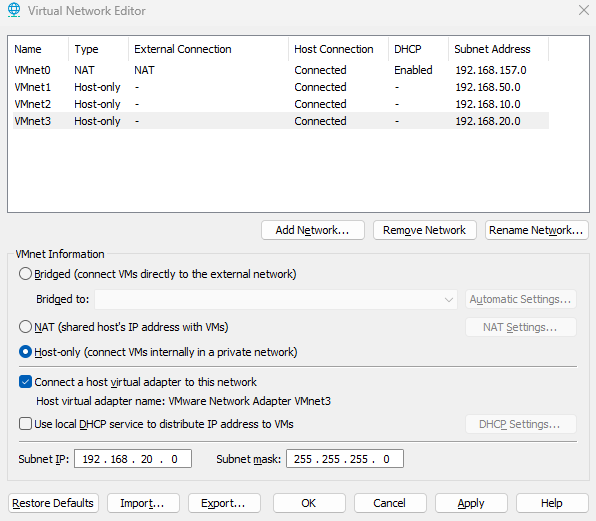
Network Segmentation with VMware
On Host A:
| VMnet | Type | Purpose | Subnet |
|---|---|---|---|
| VMnet0 | NAT | Internet access for pfSense, Kali | DHCP via host |
| VMnet1 | Host-Only | DMZ network | 192.168.50.0/24 |
| VMnet2 | Host-Only | Internal LAN | 192.168.10.0/24 |
| VMnet3 | Host-Only | SIEM network (Splunk target zone) | 192.168.20.0/24 |
On Host B:
- Splunk Connects via VPN Client to pfSense and gets routed into all internal networks.
This lab isn’t just a playground, its a simulated enterprise network, and its helped me understand the critical flow between attack, detection and response in a segmented, monitored and secure environment.
How to Setup VMware on Windows Host
- Open VMware WorkStation
- Go to Edit → Virtual Network Editor
- Click Change Settings (You’ll need admin rights)
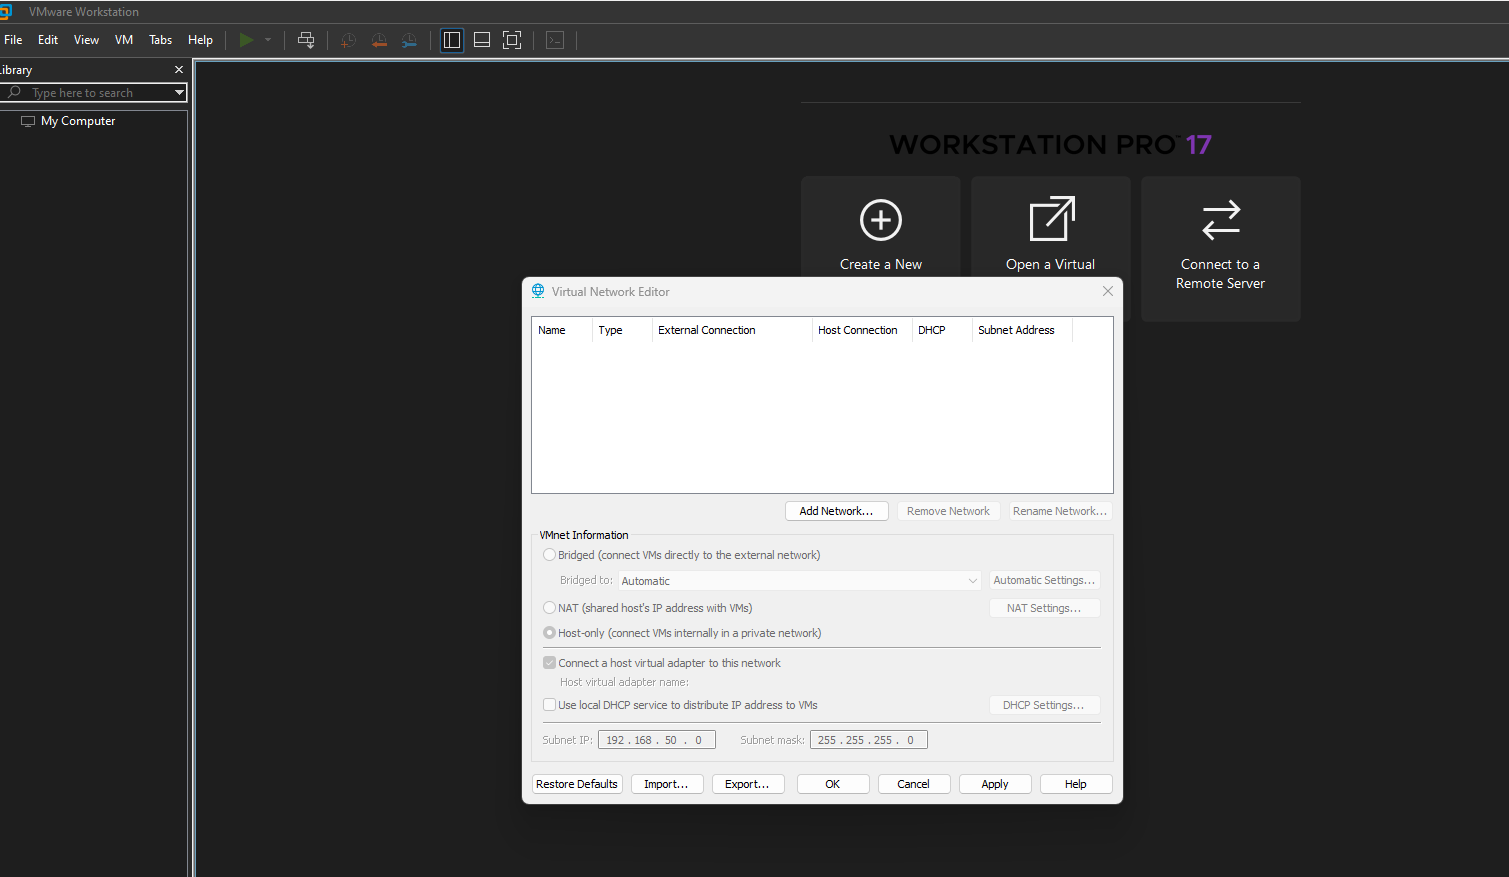
Configure the Networks one by One
- VMnet0 (NAT) - Internet
- Type: NAT
- No need to set Subnet - VMware handles it (Typically 192.168.1.0)
- Providing Internet to pfsense & Kali Linux
- VMnet1 (Host-Only) - DMZ
- Type: Host-only
- Set Subnet IP: 192.168.50.0
- Subnet mask: 255.255.255.0
- Disable DHCP (We will use pfsense as the DHCP if needed)
- VMnet2 (Host-Only) - LAN
- Type: Host-only
- Set Subnet IP: 192.168.10.0
- Subnet mask: 255.255.255.0
- Disable DHCP
- VMnet3 (Host-Only) - SIEM
- Type: Host-only
- Set Subnet IP: 192.168.20.0
- Subnet mask: 255.255.255.0
- Disable DHCP
Installing and Configuring pfSense Firewall
pfsense will act as the heart of our segmented network— everything routes through it.
Download the pfsense ISO from the the link I provided in the Tools & Tech Stack section.
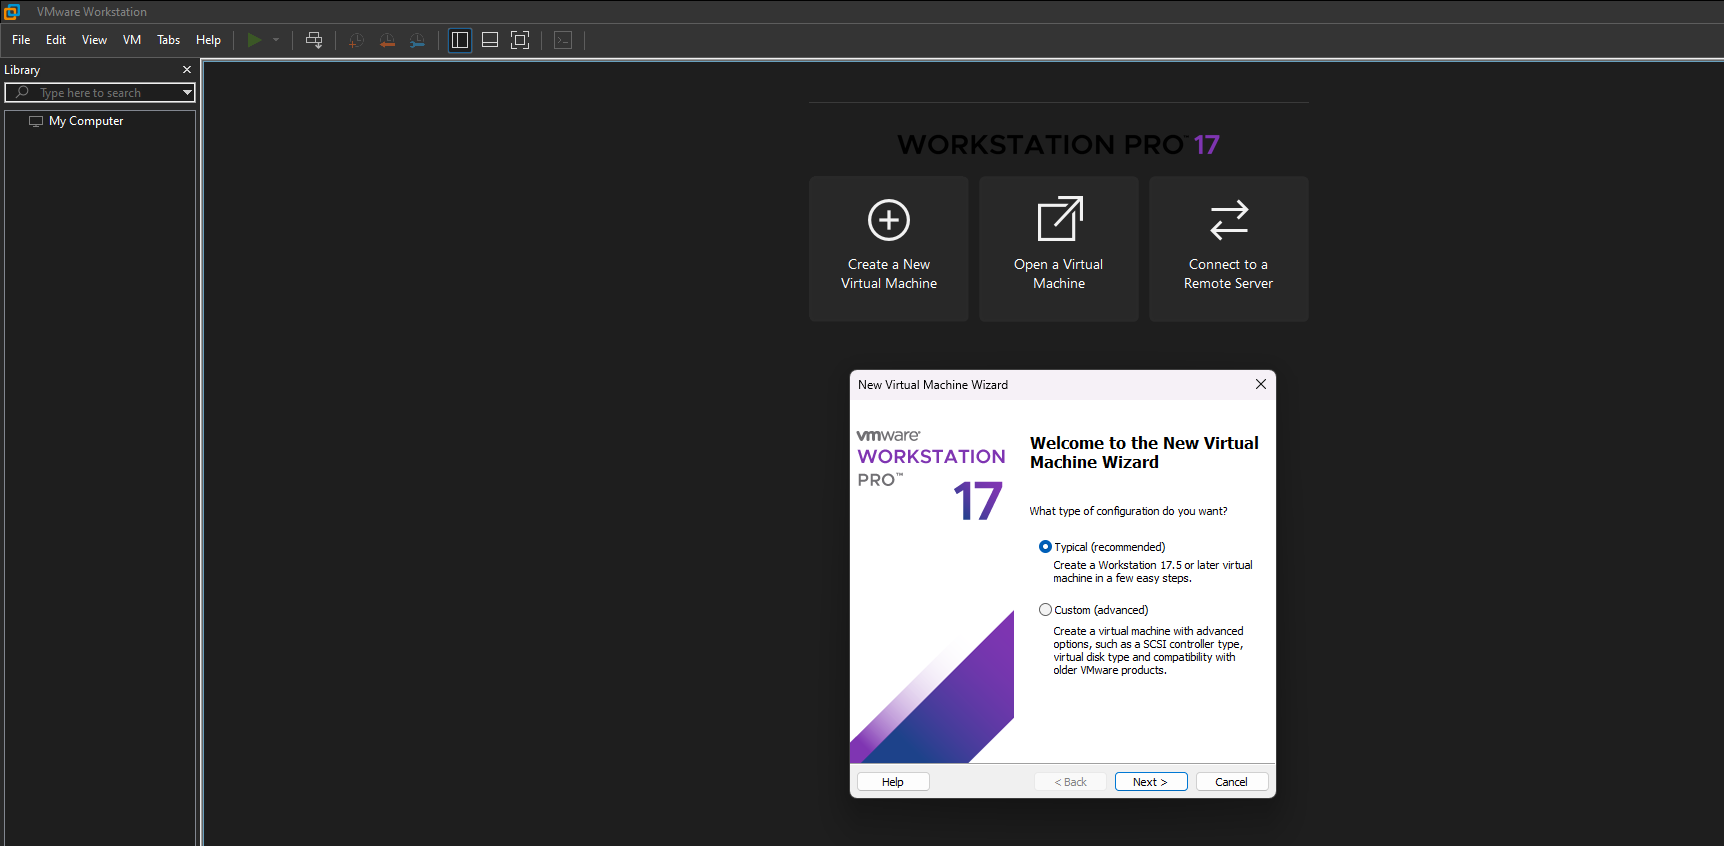
Create a New VM in VMware:
Click “Create a New Virtual Machine” on VMware workstation Dashboard. and Make sure you Select the “Typical (recommended)
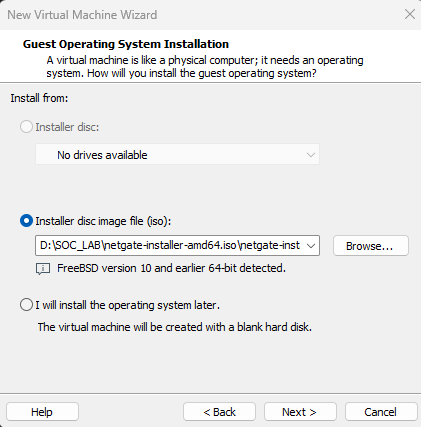
Click “Browse and navigate to the folder where your pfsense file is located and click next.
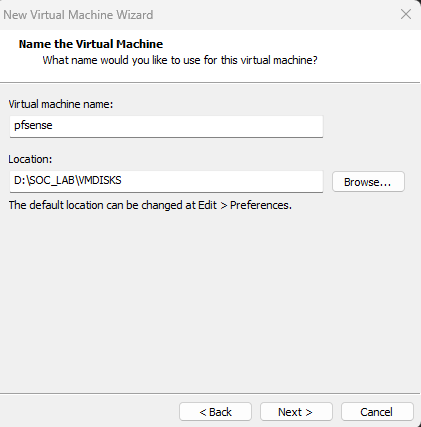
Let’s Rename the Virtual machine as “pfsense” and click next.
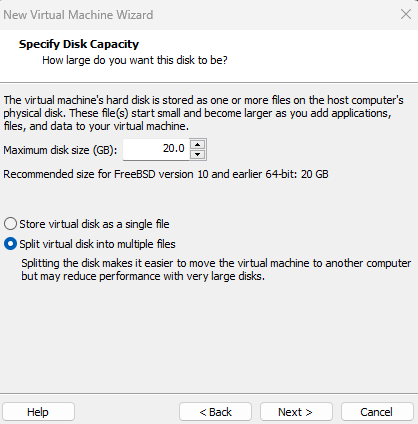
I’m going to choose 20GB Disk Size for this VM, its more than enough for this lab and Ensure you select the “Split Virtual Disk into multiple files” option is selected and click next.
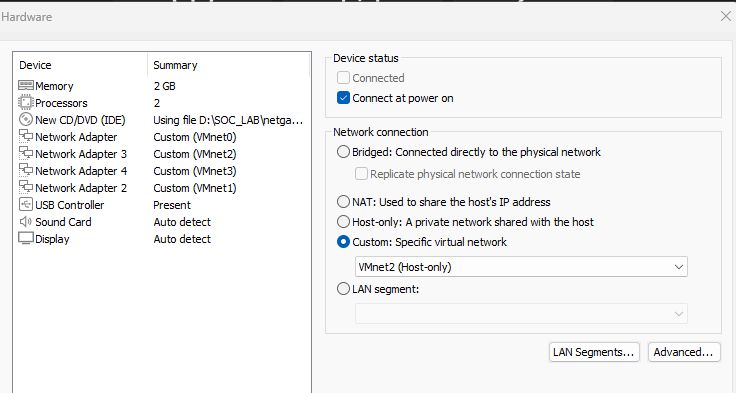
Now click “Customize Hardware”.
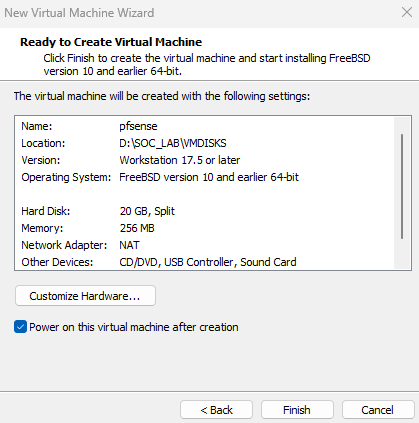
Increase the Memory to 2GB and add 2 CPUs.
Add 4 network adaptors we created earlier.
- NIC 1: VMnet0 (NAT) → WAN
- NIC 2: VMnet1 (Host-only) → DMZ
- NIC 3: VMnet2 (Host-only) → LAN
- NIC 4: VMnet3 (Host-only) → SIEM
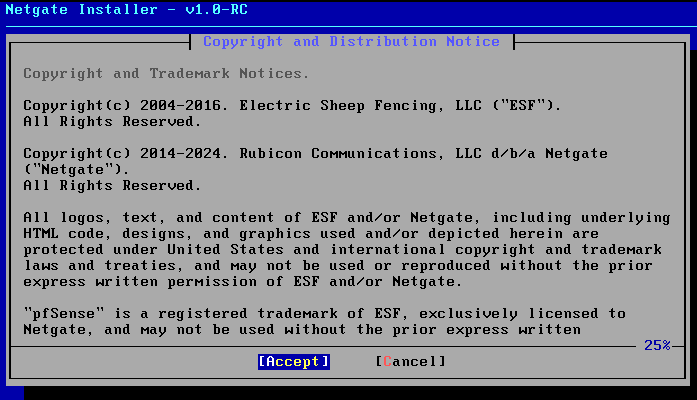
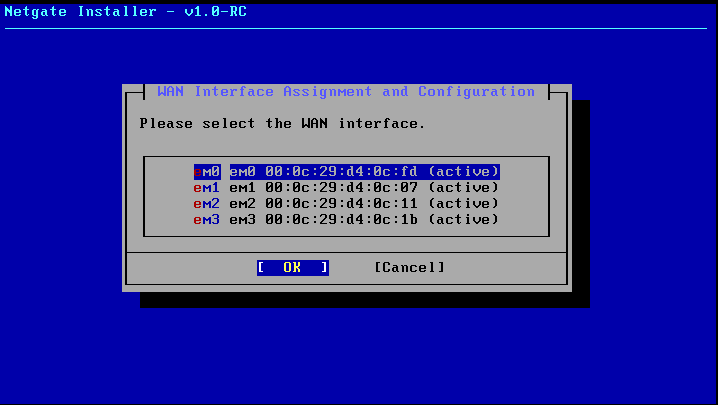
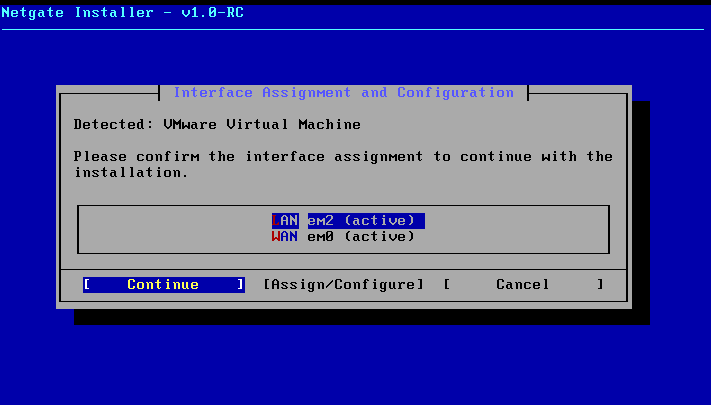
Once you click Finish. pfsense machine will power on and start with the screen below. Click accept all the defaults and after that, pfsense will reboot.
Select the WAN interface and note down the MAC addresses since these are crucial information. In our case em0 is our WAN interface.
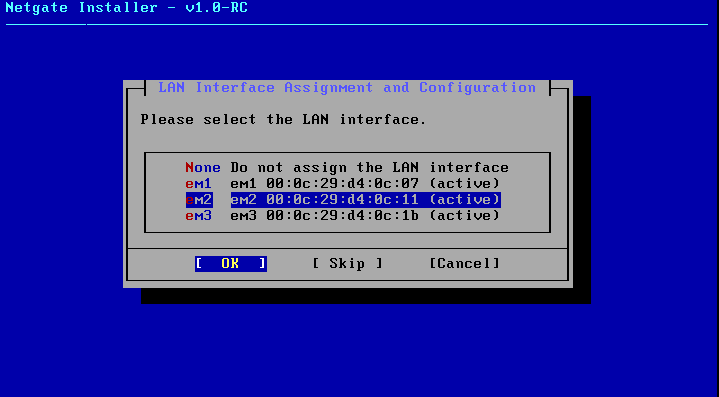
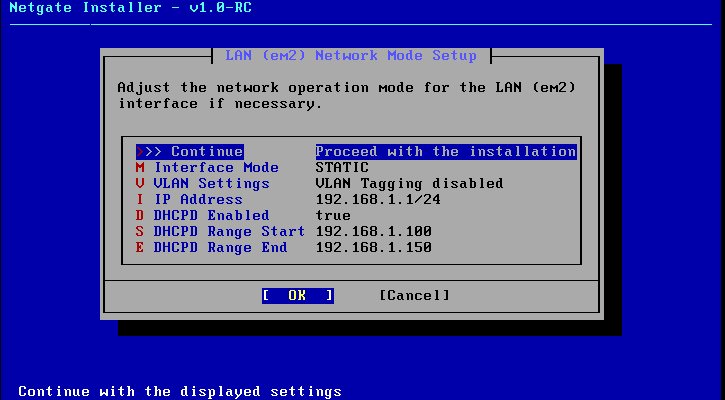
We will choose em2 as the LAN interface since its align with our setups.
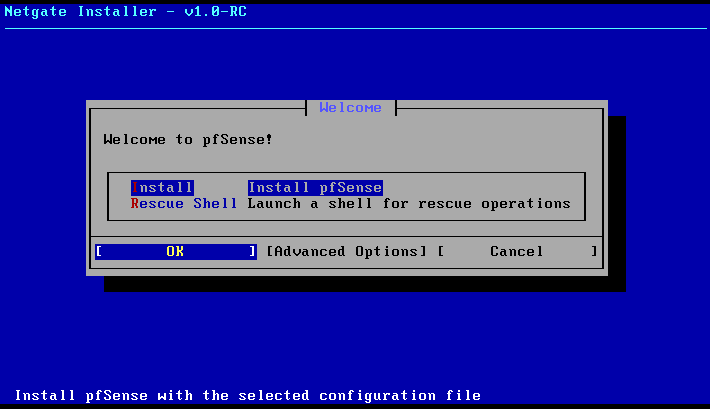
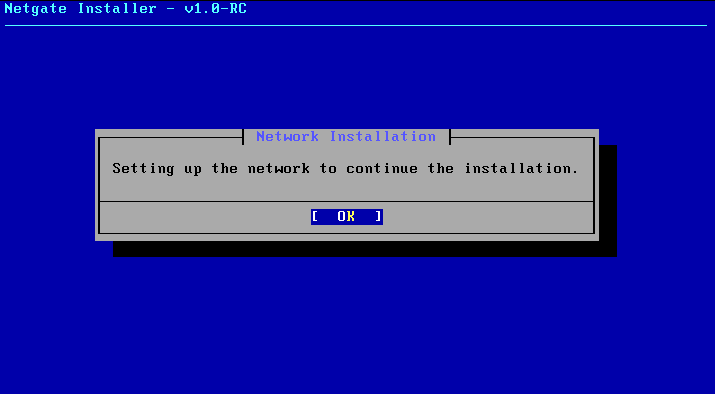
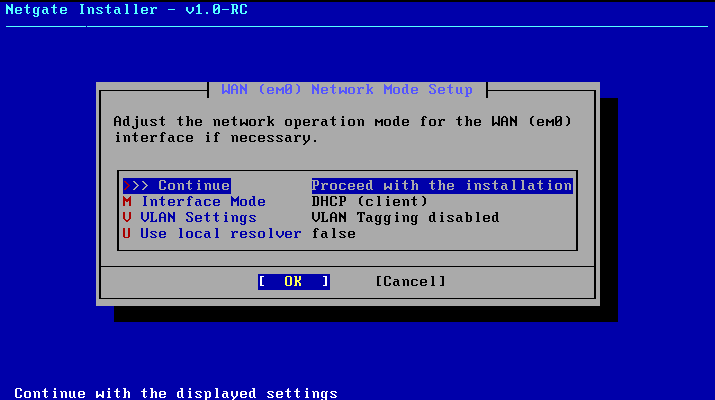
Click Continue to proceed with the installation.
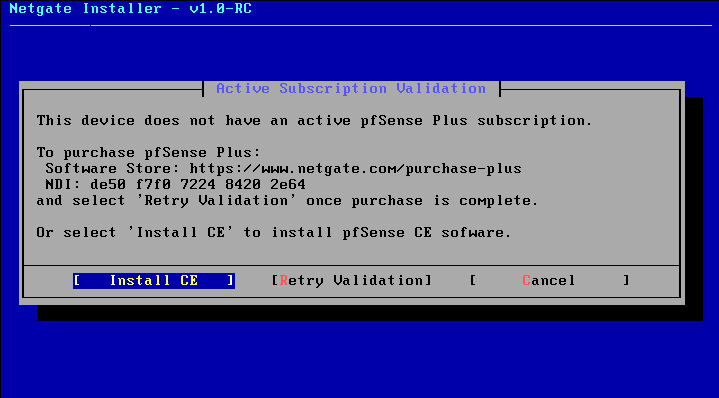
Lets select the WAN interface and click install CE in the next window.
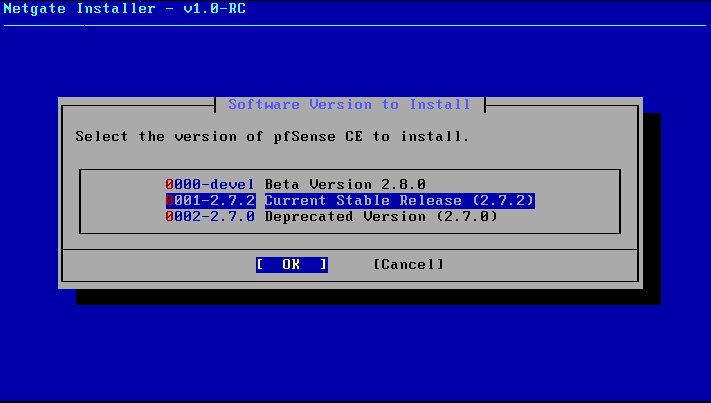
Select the Suitable Disk and Choose the version of the pfsense. Here I’m going to select the Stable release.
After the installation, VM will reboot.
Pfsense Configurations
Once we completed the Installation you will get the Window like below. From the window, We select option 1 to Assign the interface.

Should VLANS be setup now [y:n]? n
Enter em0, em1, em2, em3 respectively for each consecutive question.
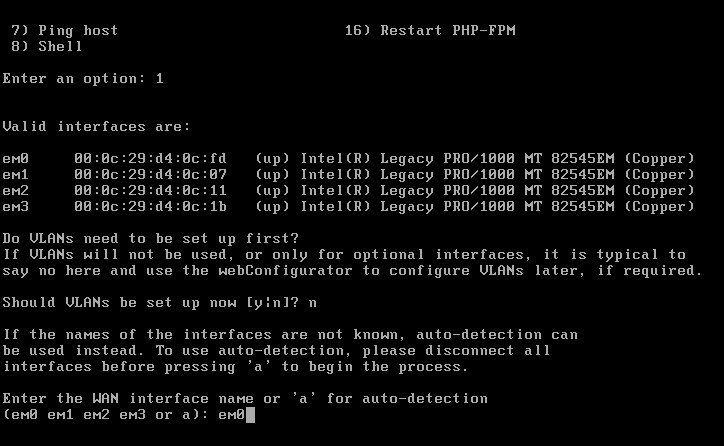
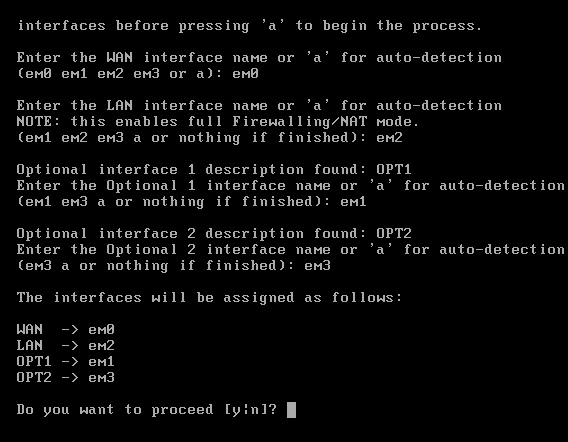
Now proceed with “y” and after configured the WAN and the LAN Interfaces.
Now Select option 2 to set the interface IP address. Now it will prompt to enter the interface number.
Now follow this:
For WAN (em0) — choose 1
- Do you want to configure IPv4? →
y - Do you want to use DHCP? →
y - Do you want to configure IPv6? →
n - Done ✅
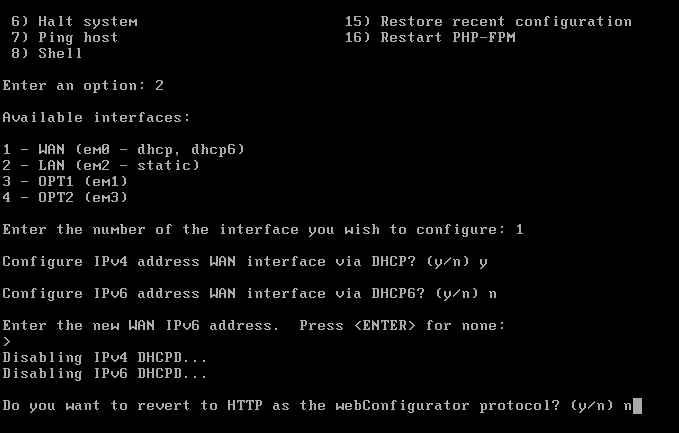
For the HTTP as the web configurator, we are going to choose “n” since HTTP is less secure and HTTPS will be more secure
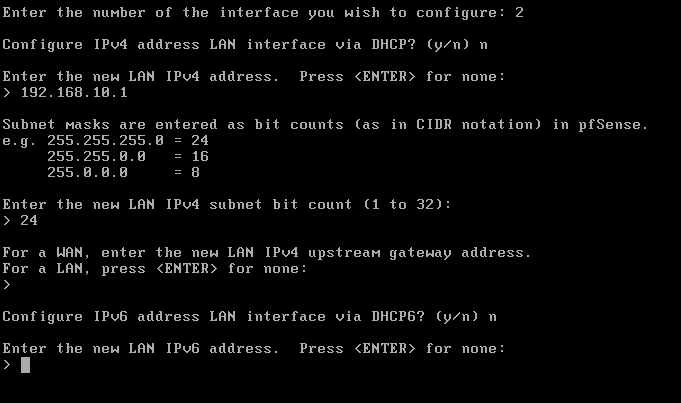
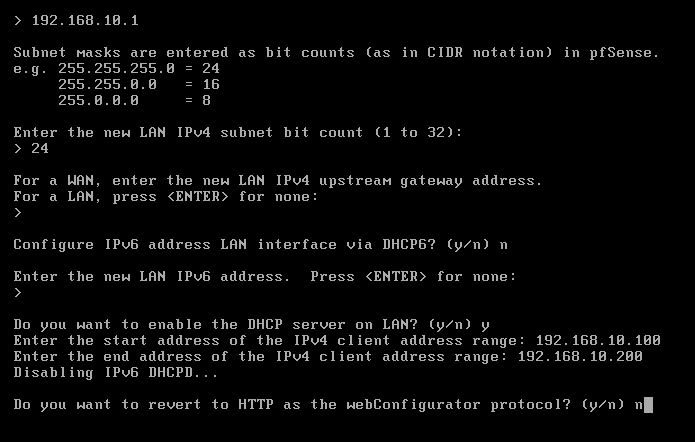
For LAN (em2) — choose 3
- Do you want to configure IPv4? →
y - Enter the new LAN IPv4 address →
192.168.10.1 - Subnet bit count (1 to 32) →
24 - Do you want to enable DHCP? →
y - Start address →
192.168.10.100 - End address →
192.168.10.200 - Do you want to configure IPv6? →
n - Done ✅
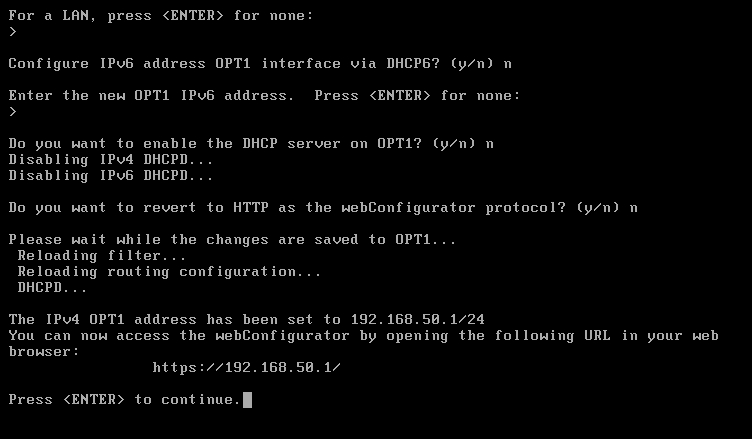
For DMZ (em1) — choose 2
- Do you want to configure IPv4? →
y - Enter the new LAN IPv4 address →
192.168.50.1 - Subnet bit count (1 to 32) →
24 - Do you want to enable DHCP? →
n - Do you want to configure IPv6? →
n - Done ✅
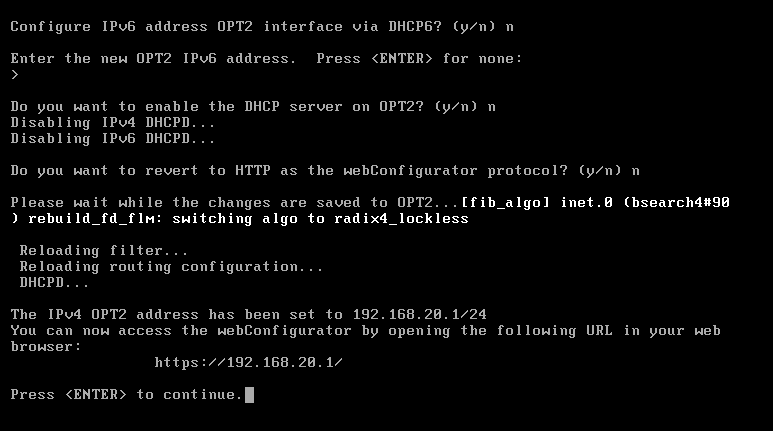
For SIEM (em3) — choose 4
- Do you want to configure IPv4? →
y - Enter the new LAN IPv4 address →
192.168.20.1 - Subnet bit count (1 to 32) →
24 - Do you want to enable DHCP? →
n - Do you want to configure IPv6? →
n - Done ✅
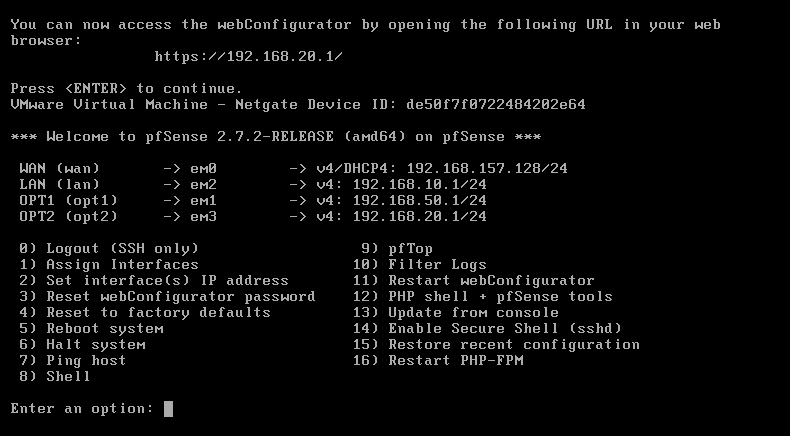
Once we configured the IP address for every interfaces, It will be look like the below image.
Now lets take a back up of the VM Disk and Take the Snapshots as well, as the best practice.
Installing Kali Linux (Attacker Machine)
Network Setup for Kali:
Since we want kali to have the internet access:
- Network Adapter: VMnet0(NAT)
- IP Range: Automatically assigned by the NAT
- Optional: Set a Static IP if we want easier log monitoring or SSH access.
Step-by-Step Installation
- Download the Kali Linux Disk file or ISO
- Create VM in VMware Workstation:
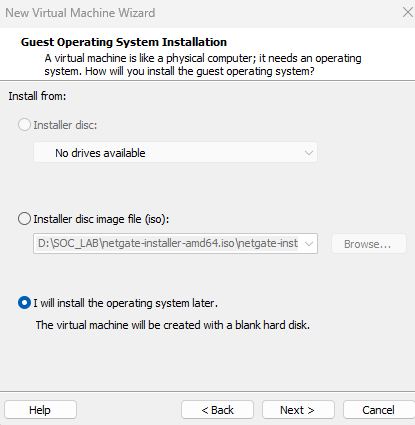
- New Virtual Machine - Typical
- This time we are going to use the Disk, There fore Choose “ I will install the operating system later”
Select the Guest Operating system as Linux and the version should be Debian 12.x 64 bit.
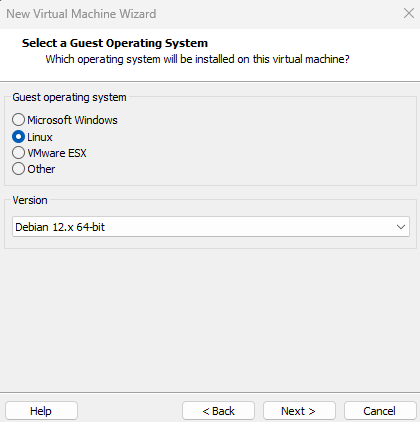
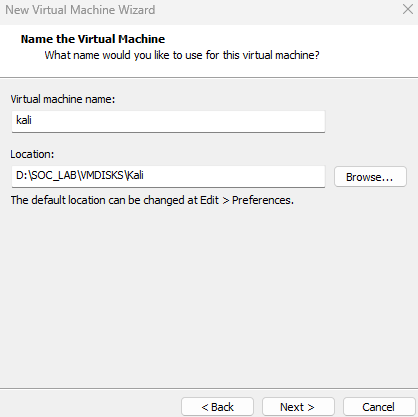
Lets Rename the VM as “Kali”.
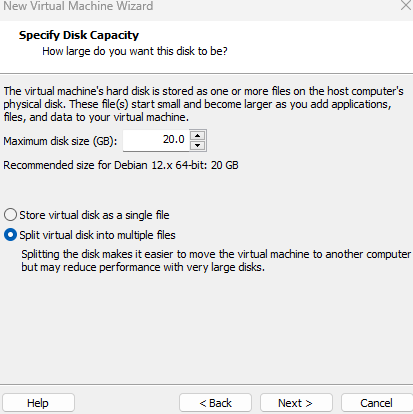
I’m going to choose 20GB Disk Size for this VM, its more than enough for this lab and Ensure you select the “Split Virtual Disk into multiple files” option is selected and click next.
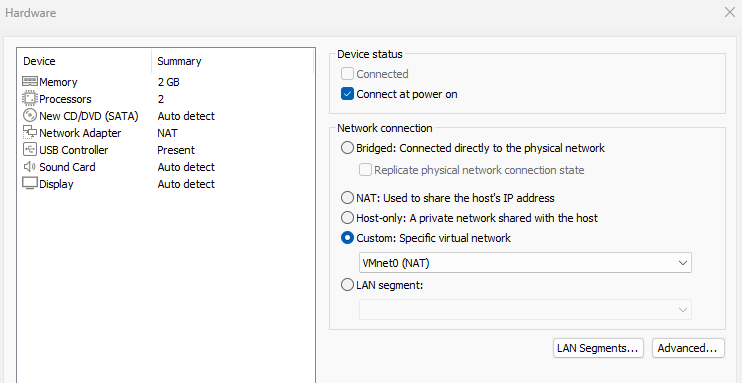
I’m going to choose 2GB Memory and the Network Adopter as VMnet0.
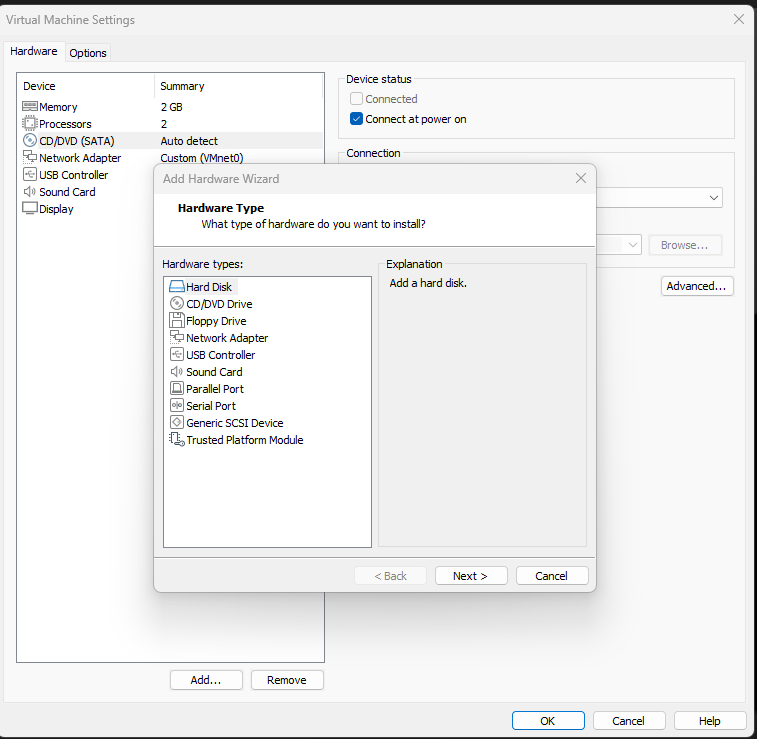
Now its time to add the Kali Disk. For that, Just finish the Configuration and Click “Edit Virtual Machine Settings” you will notice that, new hard drive has been created.

Now we have to remove the disk and add the downloaded disk as the primary hard drive.
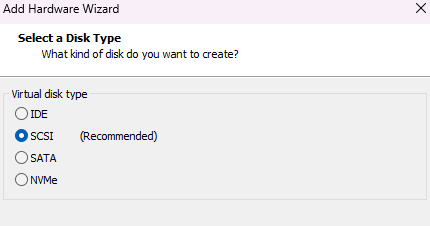
Select the Disk Type as SCSI and Click Next.
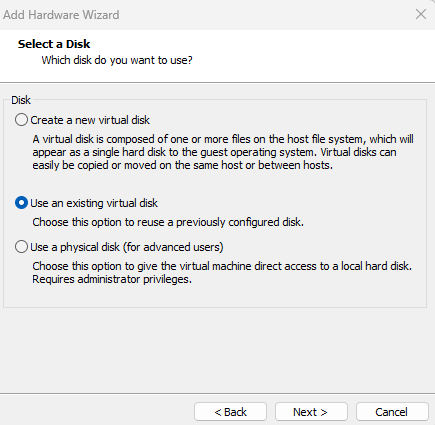
Now choose the “Use an existing virtual disk” Option and browse the download Virtual disk file.
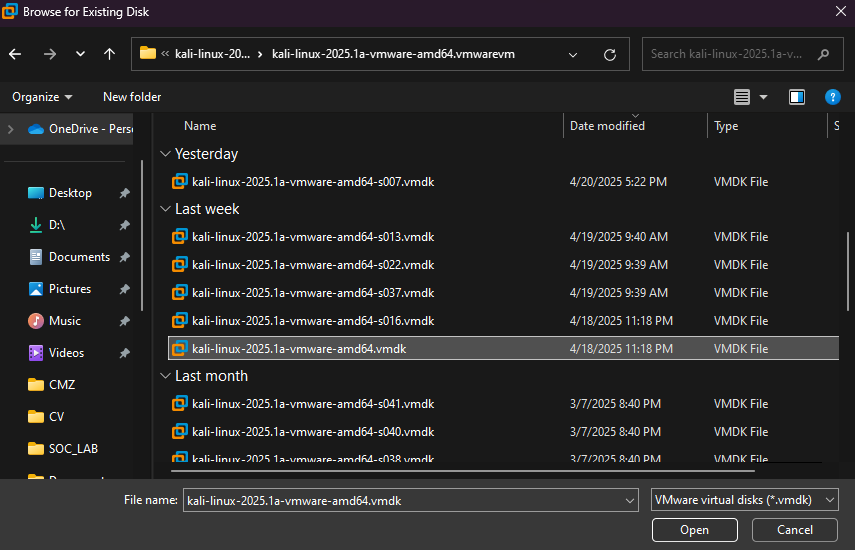
Now click ok and Bootup the VM. And here we go.. We have the Running kali linux.
The default Credentials will be kali/kali. I am suggesting you to create a new user for the security reasons.
Set a Static IP in Kali Linux (Debian/Ubuntu Style)
Lets say:
- Kali Network: VMnet0 (NAT) — 192.168.157.0/24
- Static IP for Kali: 192.168.157.200
Gateway (pfSense WaN side or NAT gateway): usually 192.168.157.2 or whatever your NAT DHCP gives — confirm with.
1
ip route | grep default- DNS: use Google’s 8.8.8.8 or your pfsense’s WAN gateway.
Steps:
- Open the terminal in kali.
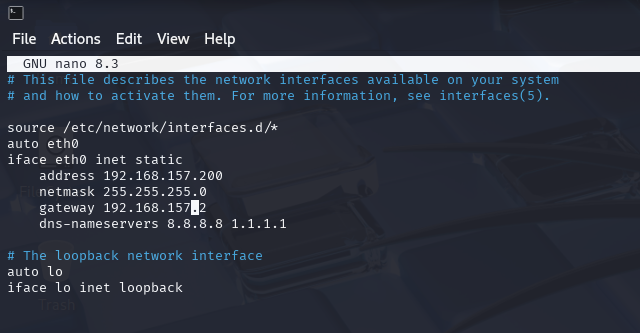
Edit the network interface file:
1
 sudo nano /etc/network/interface
Add this at the end under the eth0 — Check your interface with ip a.
1
2
3
4
5
6
7
 auto eth0
 iface eth0 inet static
   address 192.168.157.200
   netmask 255.255.255.0
   gateway 192.168.157.2
   dns-nameservers 8.8.8.8
Replace eth0 with your actual adapter name (probably ens33 in VMware).
Save the file (
Ctrl + O,Enter,Ctrl + X)Restart networking:
1
sudo systemctl restart networking
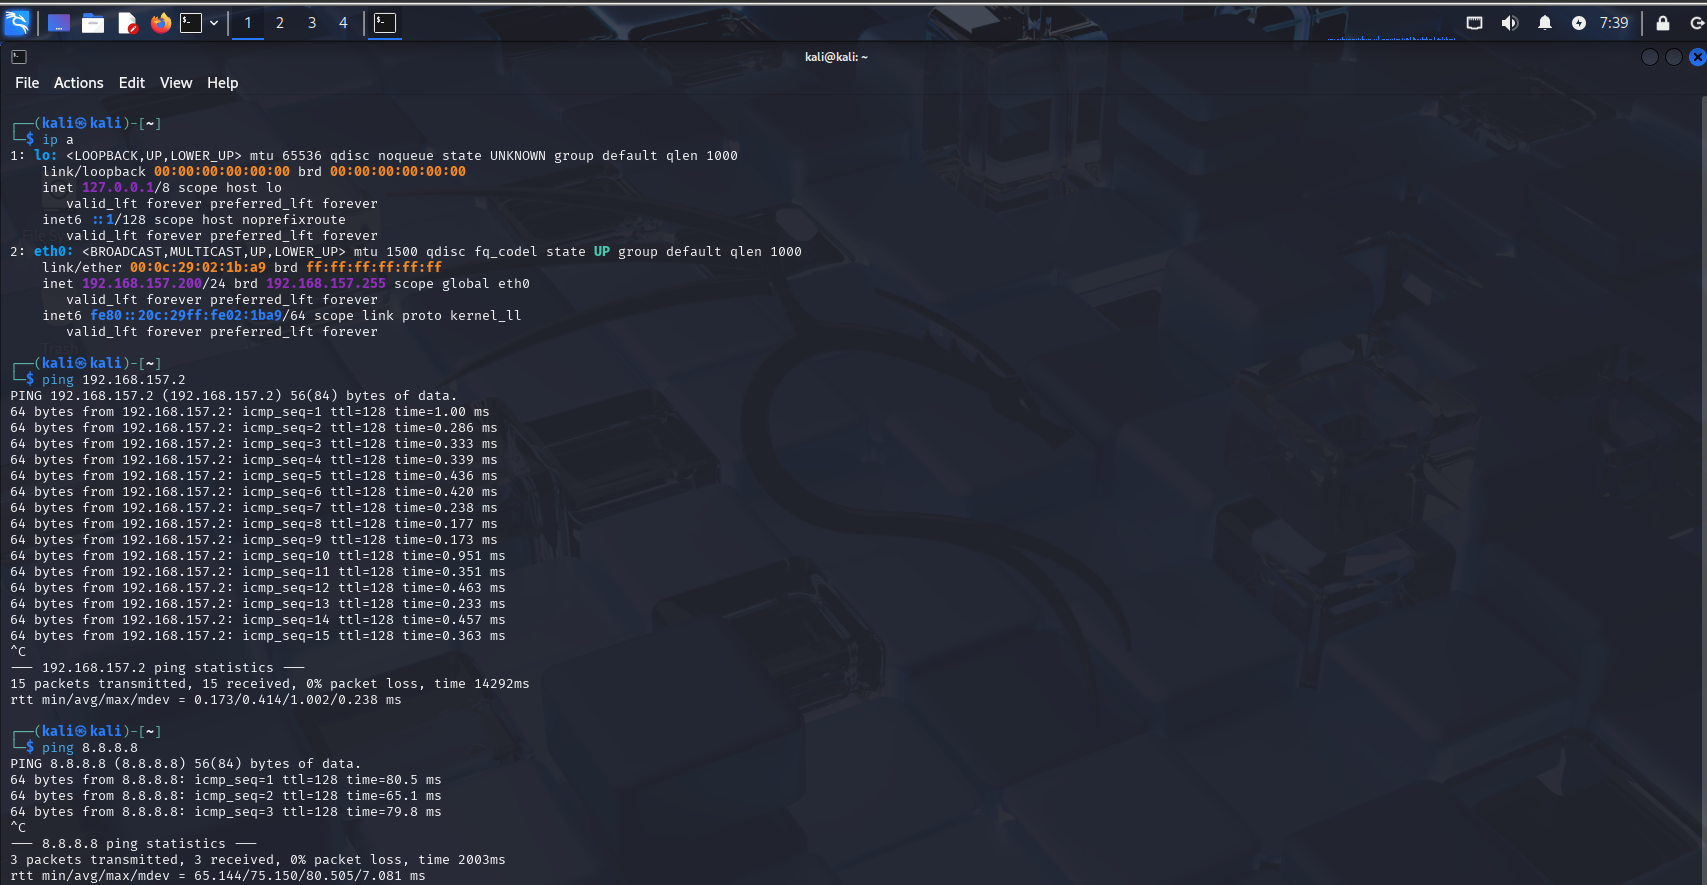
Now our kali box should have a static IP of 192.168.157.200 and internet access!
Test the connections:
Ping gateway:
1
2
  ping 192.168.157.2
Ping Internet:
1
2
  ping 8.8.8.8
Installing & Configuring Windows Server as a Domain Controller
The objective of this section is to setup an Active Directory domain with a Windows 2022 Server as the Domain Controller and a Windows 10 Machine.
Step1: Create a New VM for Windows Server 2022
- Open VMware Workstation
- Click “Create a New Virtual Machine”
- Choose Typical Option
- Select the Installer Disk Image file (ISO) and browse your windows server 2022 ISO
- Set OS type: Microsoft Windows → Windows Server 2022
- Name it: WindowsDC1
- Choose Storage: 25GB or More (25GB is enough for a Lab Environment)
- Make sure you choose SATA Type Hard Disk.
- Select Customize Hardware
- Memory: 2GB Minimum (4 or 8 GB better for heavy tasks if available)
- Processor: 2 CPUs
- Network Adapter:
- Connect to VMnet2 (Host-Only) — 192.168.10.0 - Our Lan Network
- Finish the Wizard and Power on the Server.
If the Above method not working and if you got any error like this “Windows cannot find the Microsoft software license terms, Make sure the installation source are valid and restart the installation”, Don’t panic. Also we are going to fix some configuration issues as well.
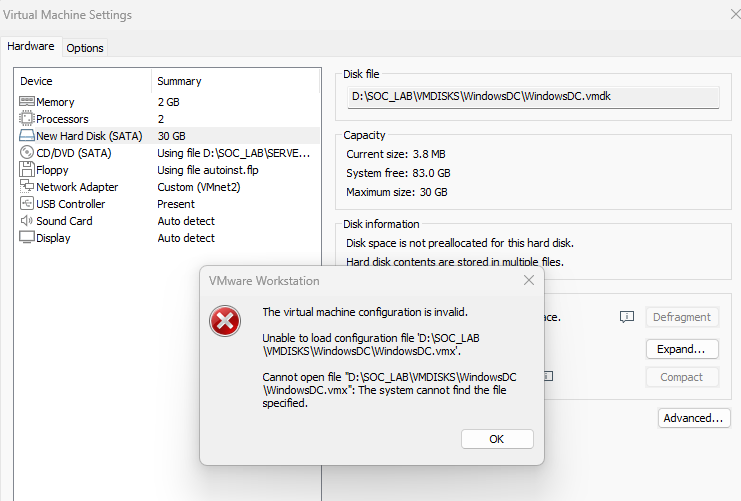
How to Fix this Cleanly (Guaranteed Working Way)
Delete the Broken VMDK File
Create a New VM
- Create a New Virtual Machine
- Customer (Advance)
- Compatibility: Same as your other VM
- Guest OS: Windows Server 2022
- New Virtual Disk
- Type: SATA
- Size: 30GB (Don’t Pre allocate)
- Store as a Single File
- Give the Location to save the VMDK file
- Connect the Windows Server ISO
- Attach your ISO to CD/DVD (SATA) Drive
- Choose the Network Adapter as VMnet2
Install the Windows Server
- Boot from the ISO
- Install to the new 30GB disk
- Complete the Setup
Step2 — Installing the Operating System
- Start the VM
- Choose your region and keyboard
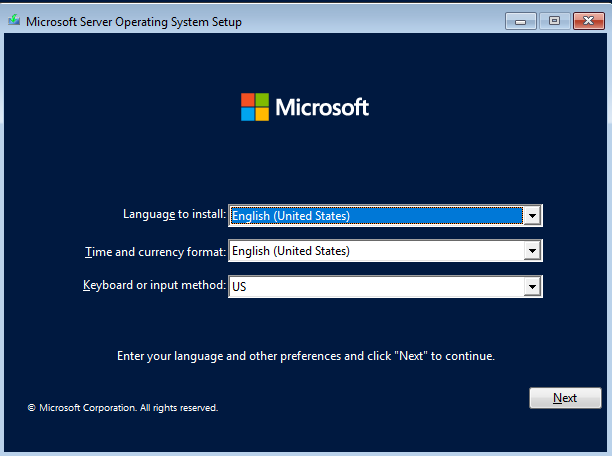
- Click Install Now
Choose Windows Server 2022 Standard (Desktop Experience)
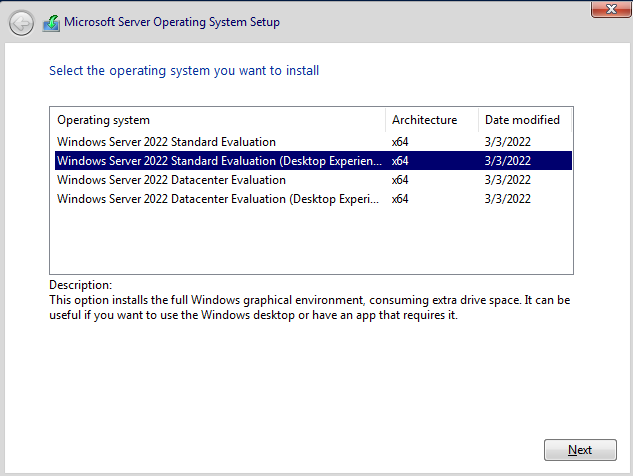
- Accept the License
- Choose Custom: Install Windows only
- Select the unallocated space and click next
Lets Install, then set your administrator password
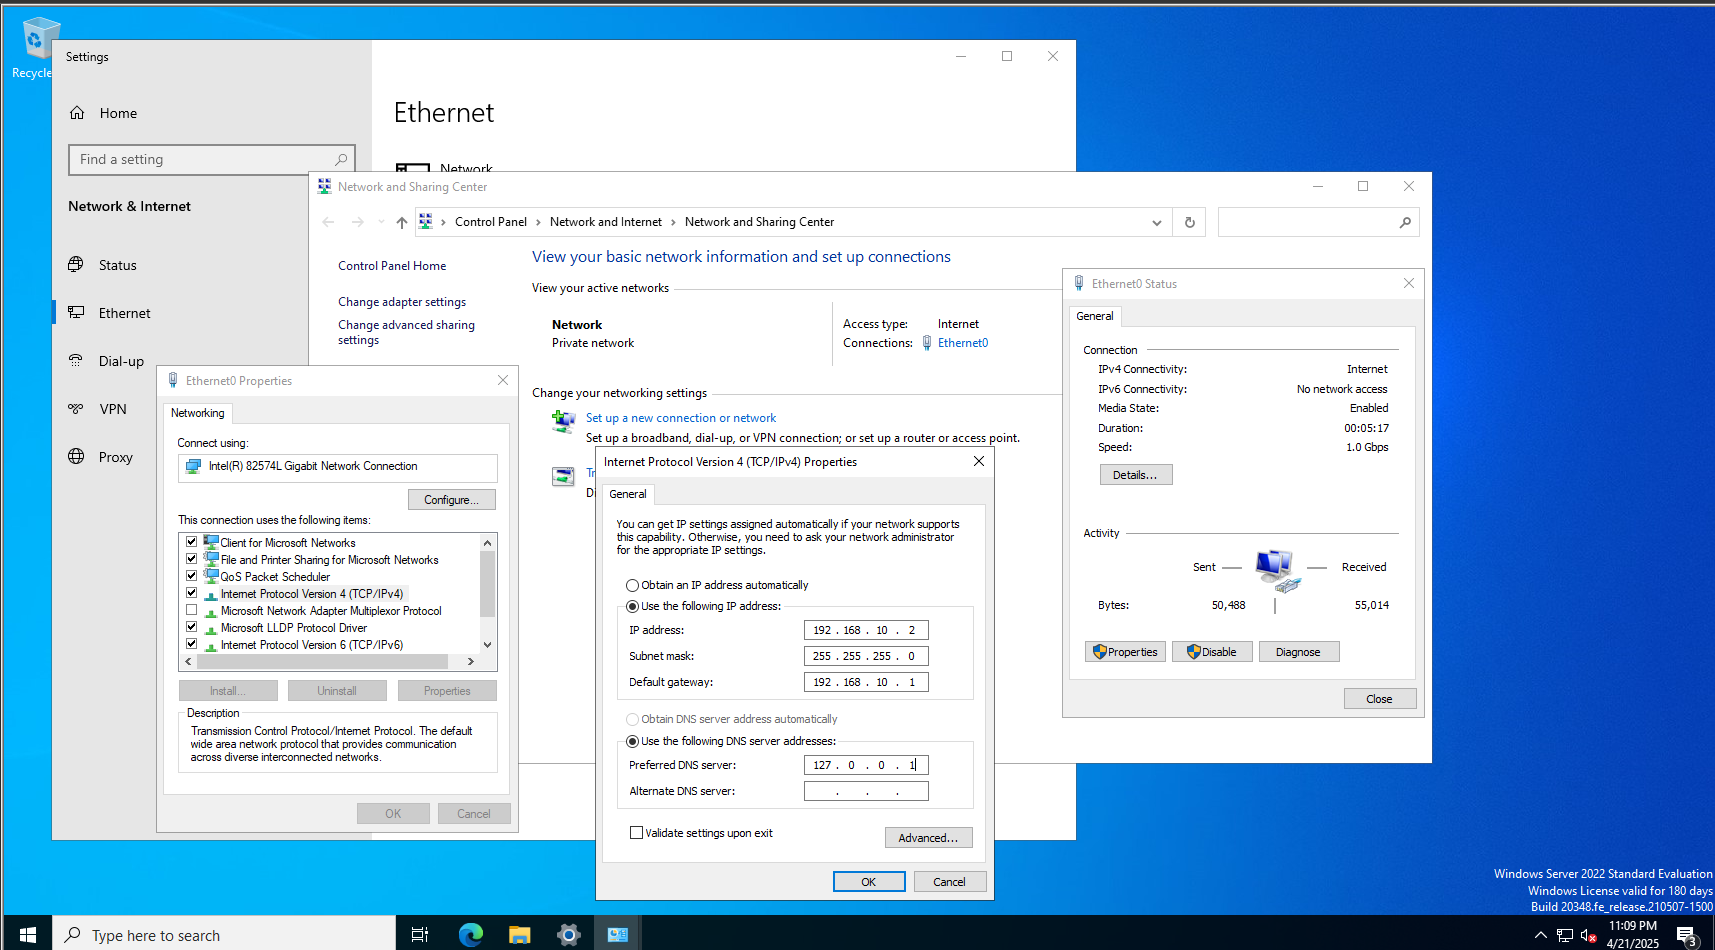
Step3— Set a Static IP Address
First of all pfSense will give you the IP address for the windows server through DHCP, But we will assign a static IP address for the bet logging and monitoring purposes.
- Login into the server and open Control Panel —> Network and Sharing Center
- Click Change Adapter Settings
- Right-Click Ethernet0 —> Properties
- Select Internet Protocol Version 4 (TCP/IPv4) —> Properties
- Set:
- IP Address: 192.168.10.2
- Subnet mask: 255.255.255.0
- Default gateway: 192.168.10.1 (pfSense LAN IP)
- Preferred DNS Server 127.0.0.1 (Will Configure Later)
- Apply the settings
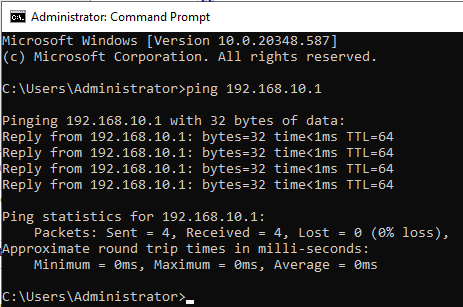
Step4 — Test the Network now
Open Command Prompt and try:
1
ping 192.168.10.1
If this works — Your VM is Properly talking to pfSense
Install Active Directory Domain Services (AD DS)
- Log in to your Windows server and Open Server Manager.
Click Manage → Add Roles and Features
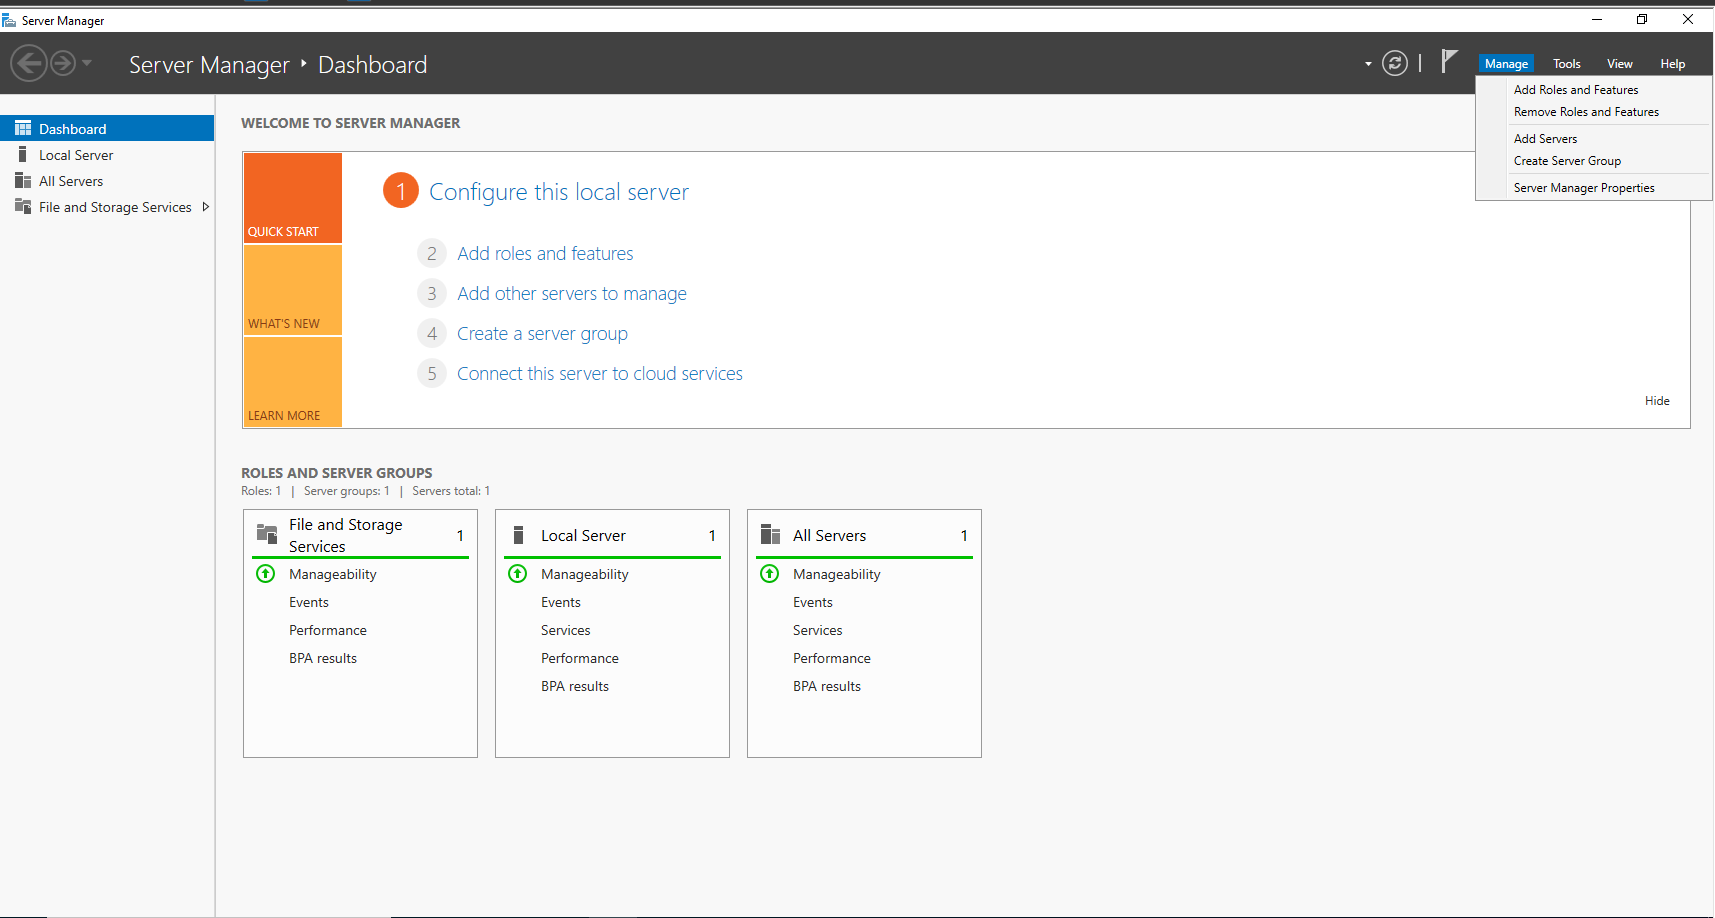
- Click Next until you get to Server Roles.
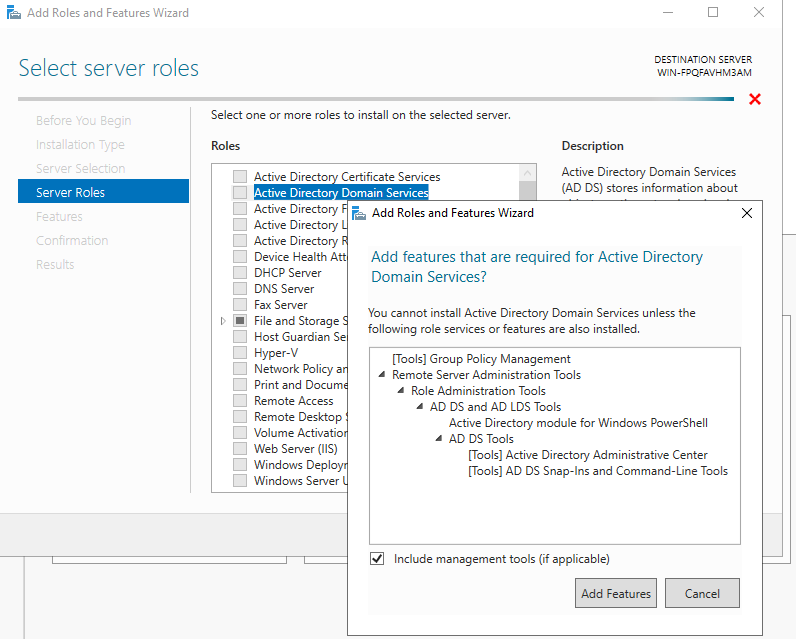
- When Prompted, add the required features.
- Keep clicking Next until you can Click Install.
- Wait for the installation to finish.
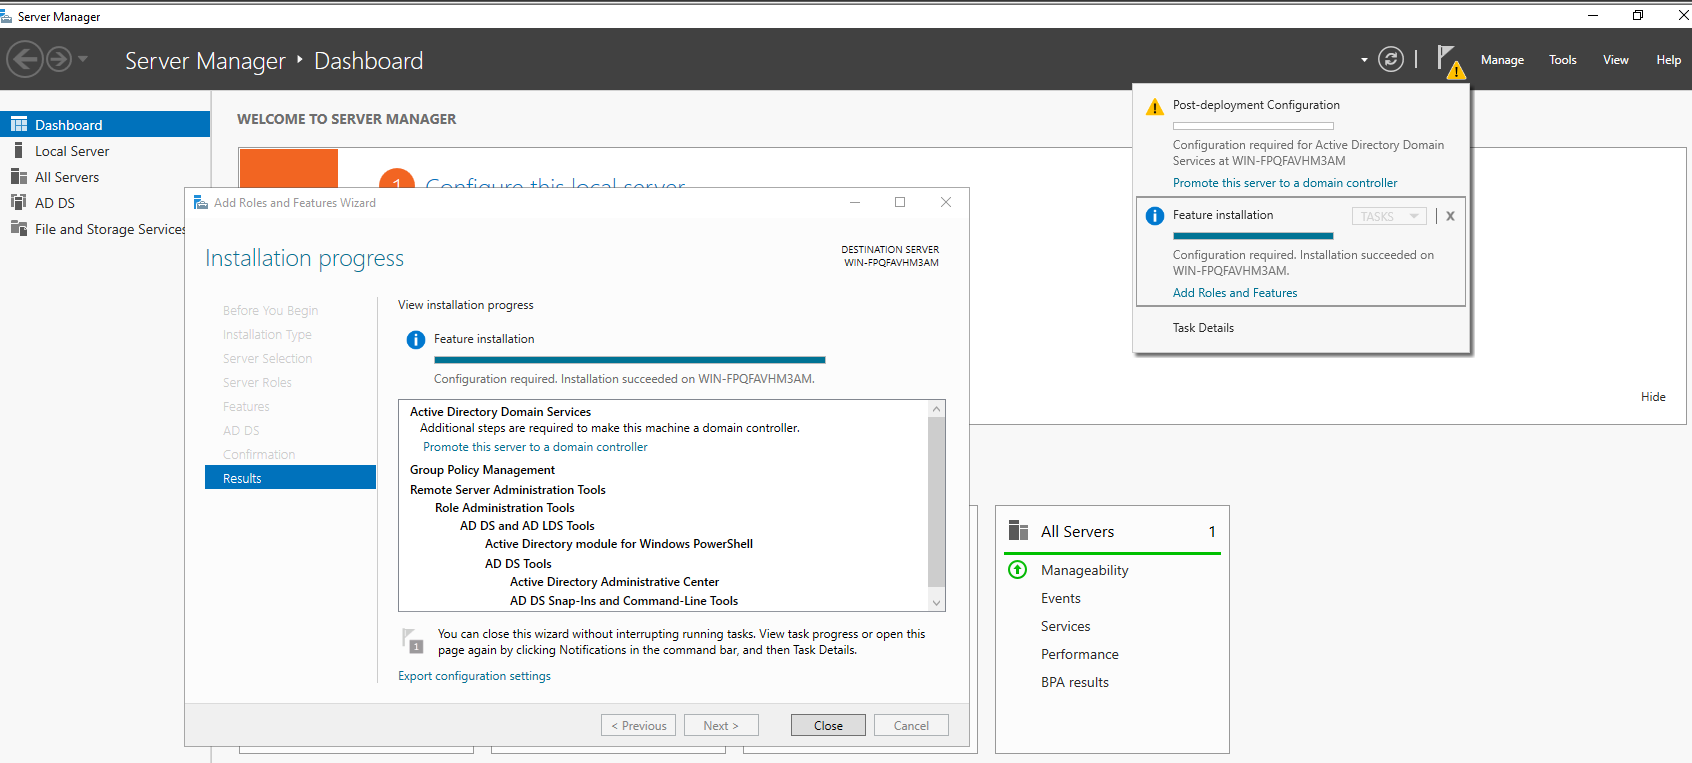
Promote the Server to a Domain Controller
Before you promote this server to Domain Controller, Its super important to change the server’s host name, because it can breaks the replication metadata, Messes with DNS records or can also cause the problems with trusts, group policies and certificates. So best practice is change the host name first.
In the Server Manager, Navigate to Local Server and Click on the Host Name and change the name.
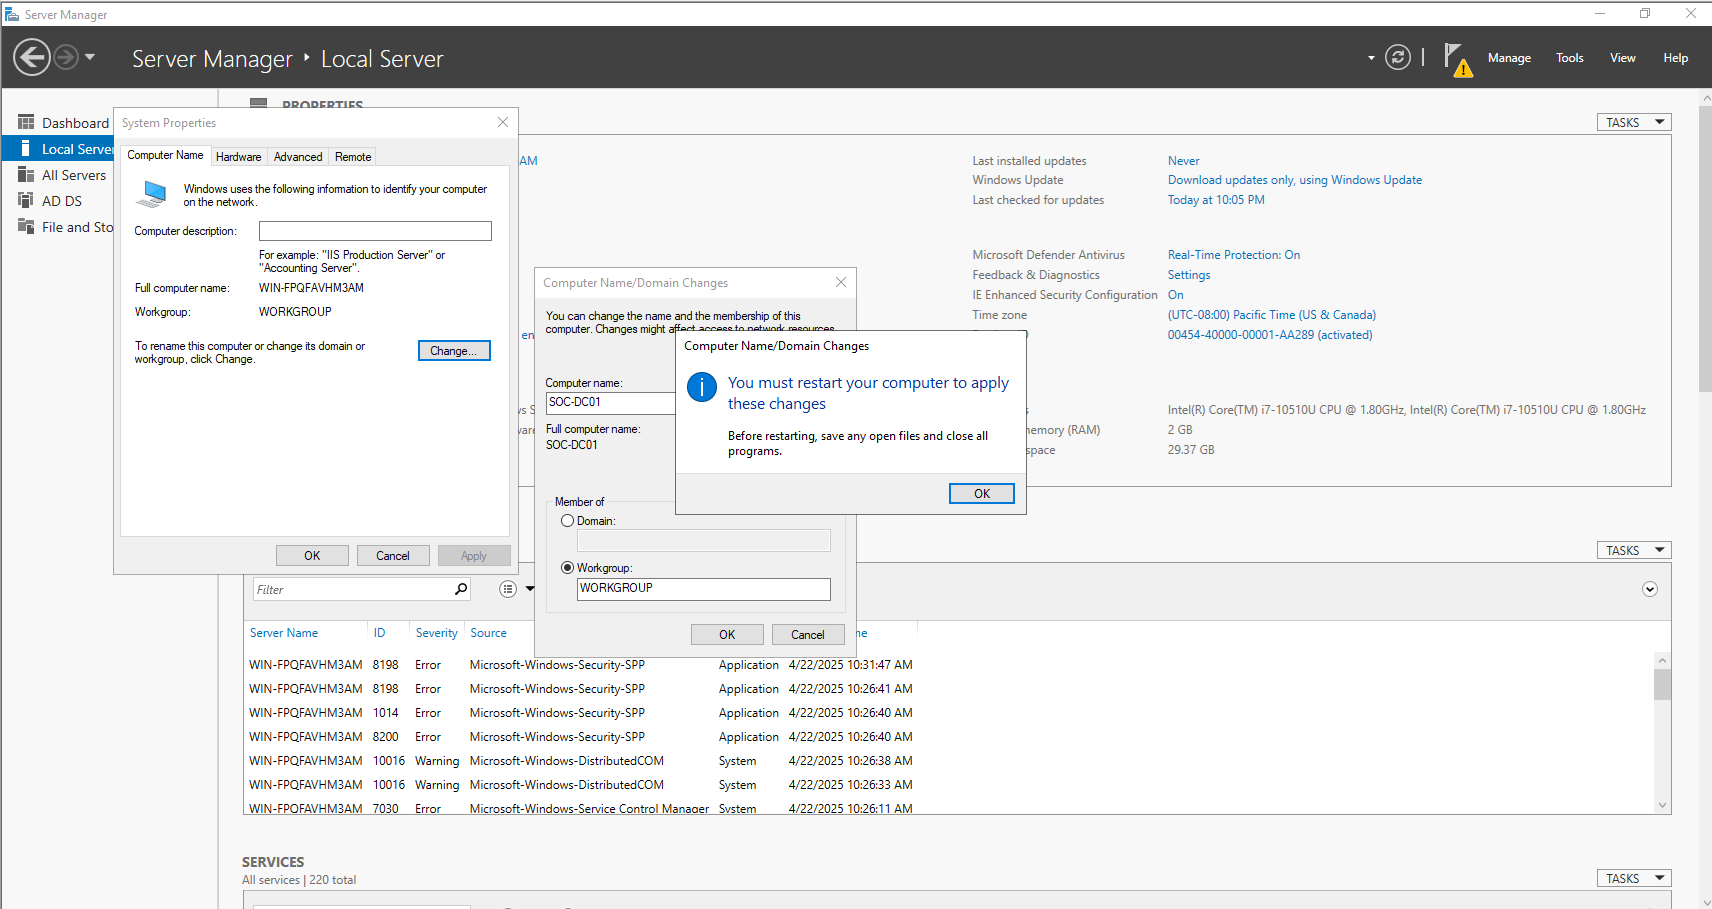
- Restart the Server
- In Server Manager, you’ll now see a yellow warning triangle.
- click Promote this server to a domain controller.
- Select Add a new forest
- Enter your domain name — example:
- soclab.local
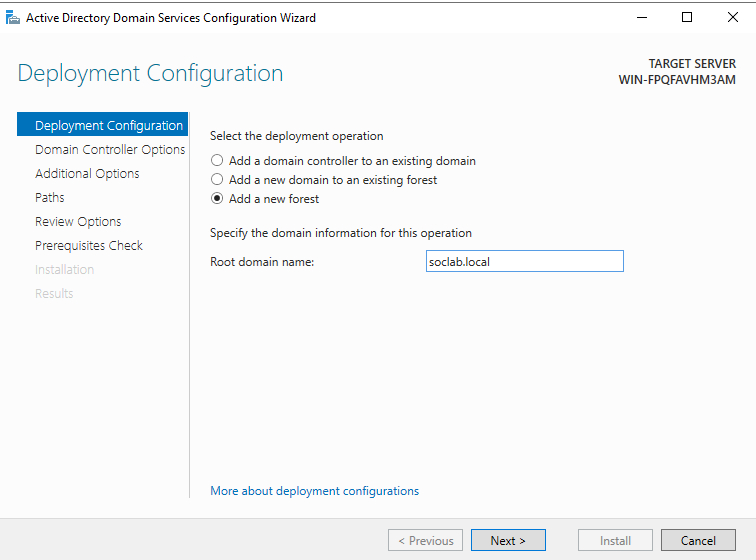
- Click Next.
- Set your DSRM password (Used for recovery — keep it safe)
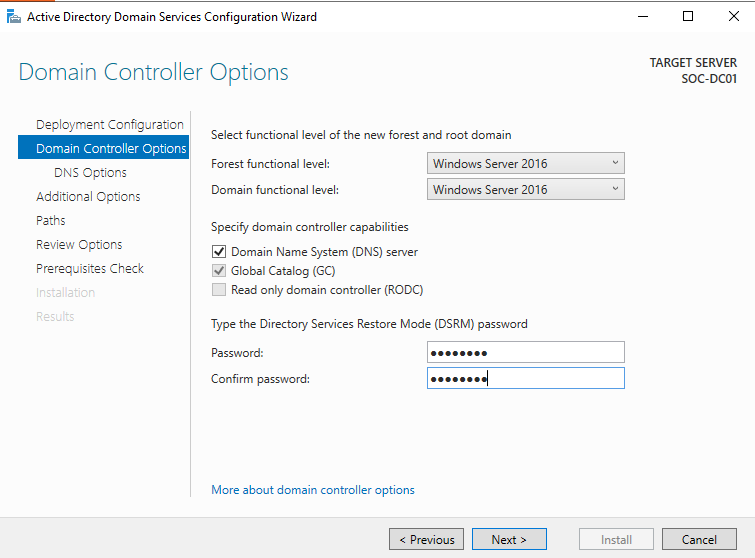
- Keep default options for DNS delegation.
- Review and confirm the NetBIOS name.
- Choose the database, log files and SYSVOL paths (defaults are fine)
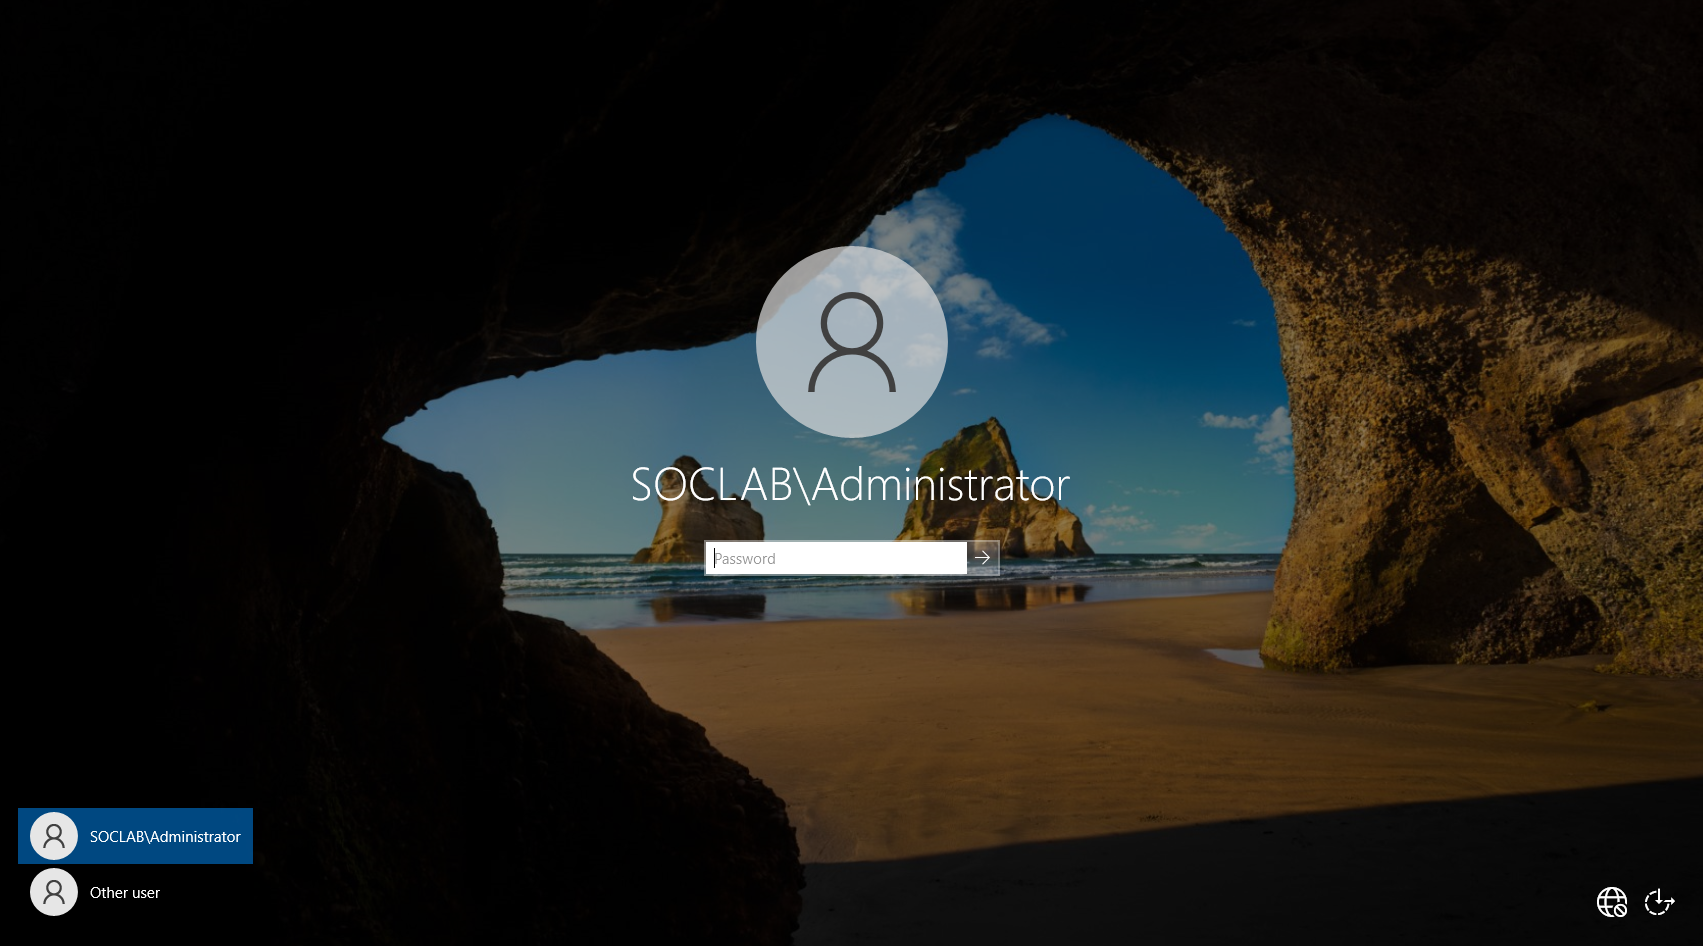
- Review and Install and After the installation, Server will reboot and you can notice the domain name Infront of the username now.
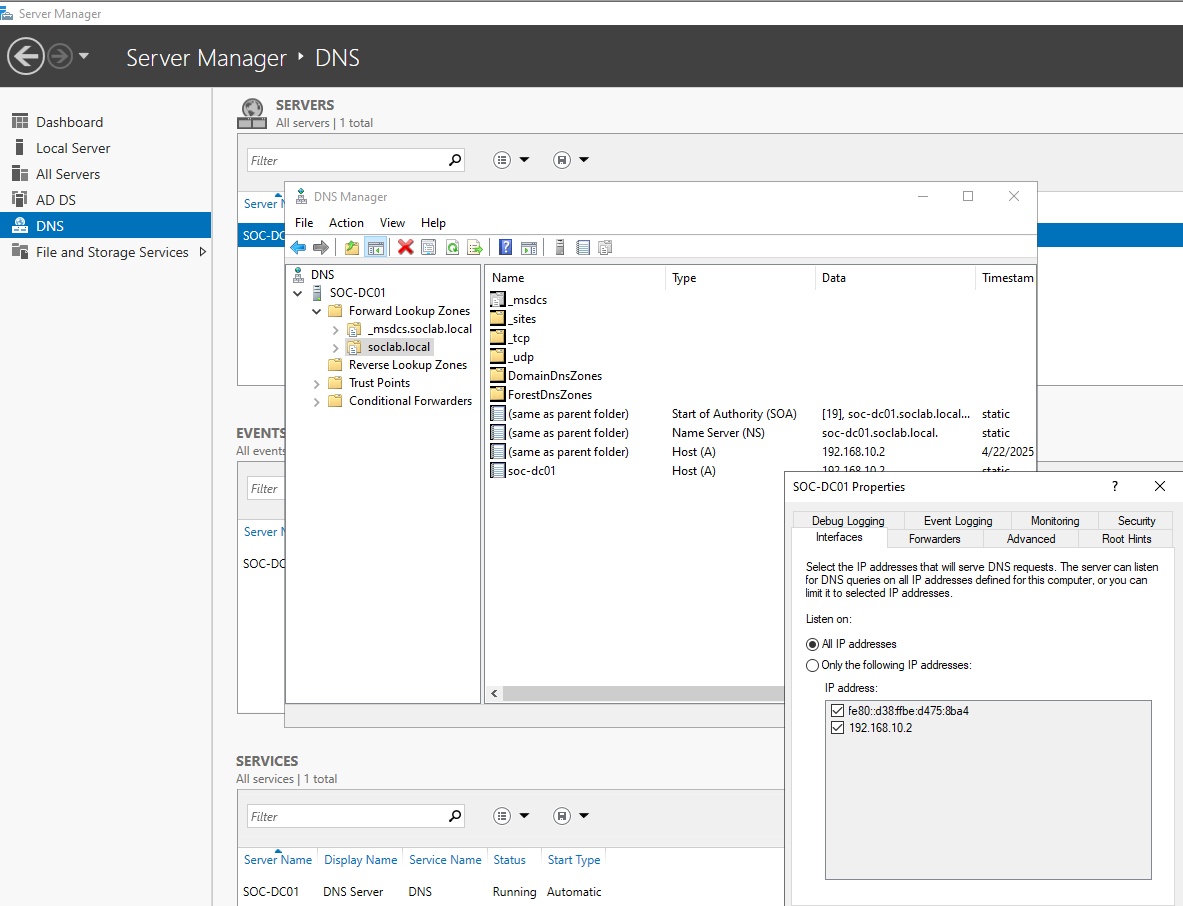
Verify DNS Configuration
After the reboot:
- Open Server Manager.
- Go to Tools → DNS
- Check that:
- There’s a forward lookup zone for soclab.local
- There’s a reverse lookup zone if you want (optional)
- Confirm that your domain Controller’s Own IP is listed as the DNS server in the network adapter settings.
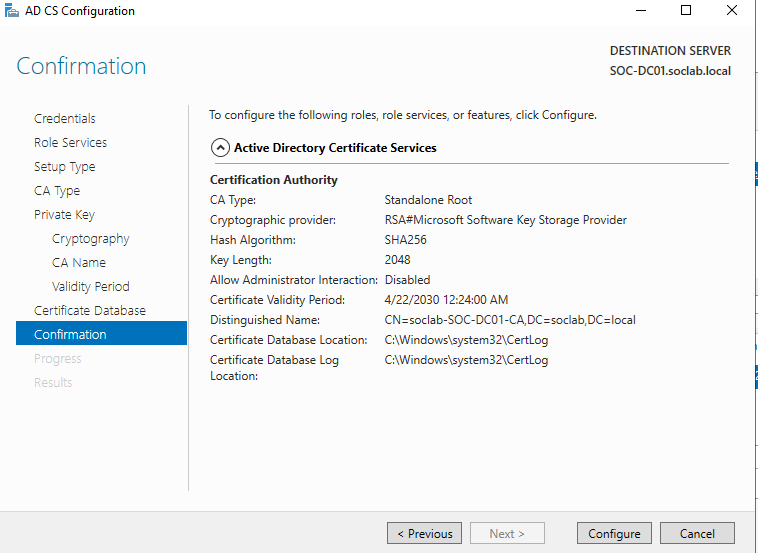
Install a Certificate Authority (AD CS)
For the future secure communications (LDAPS, HTTPS for internal apps):
- In Server Manager, Go to Manager → Add Roles and Features.
- Select Active Directory Certificate Services.
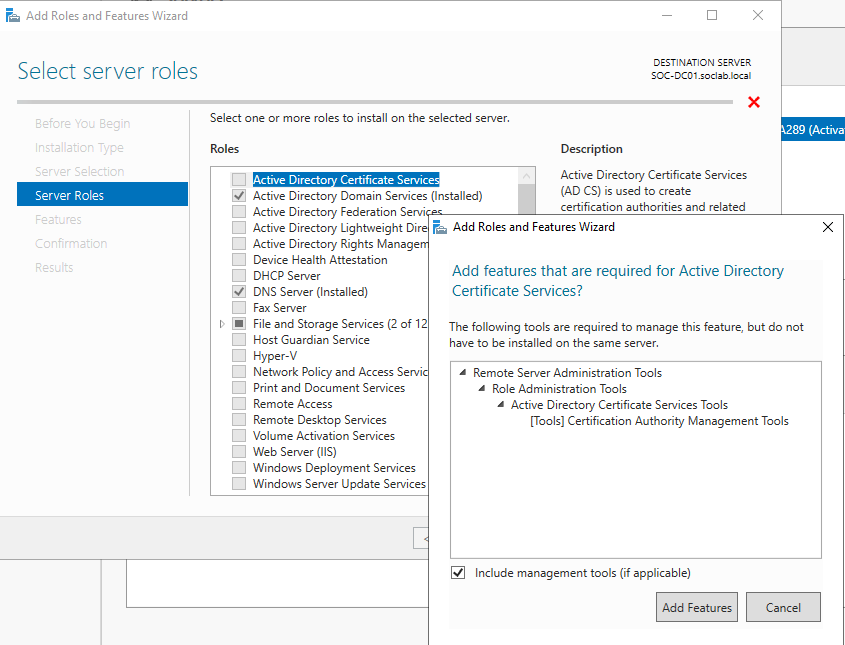
- During Configuration, Select Certificate Authority role.
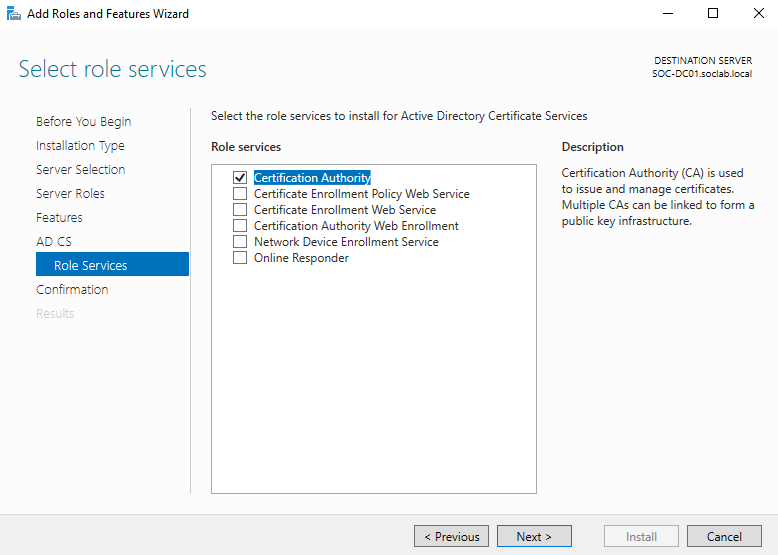
- Install and configure a Standalone Root CA (Enterprise CA is fine too since it’s on a DC)
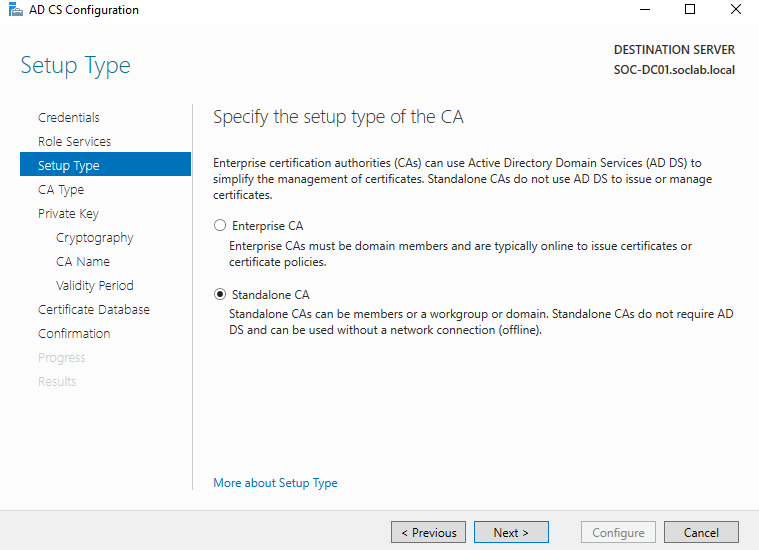
- Use the default settings and issue the certificate.
That’s it!! At this point:
- Domain Controller is up
- DNS is working
- Certificate Services are ready for secure services.
- We didn’t Configure DHCP since we configured with pfSense
Install Windows 10 and Join AD Domain (SOC Lab)
Follow the same process like you installed the Windows server VM on the VMware Workstations.
- Name the VM: Win10-Client
- Memory: 2GB
- Processors: 2 CPUs
- Network:
- Choose VMnet2 (LAN 192.168.10.0/24) — this connects it to the internal LAN through pfSense
- Install Window 10
- Boot from the ISO
- Go through the installation steps — no need to enter a product key for lab use.
- Choose Windows 10 Pro Since we are joining this to a Domain Controller.
- Create a local user - labuser
- Switch of every privacy settings in order to save the disk and memory space.
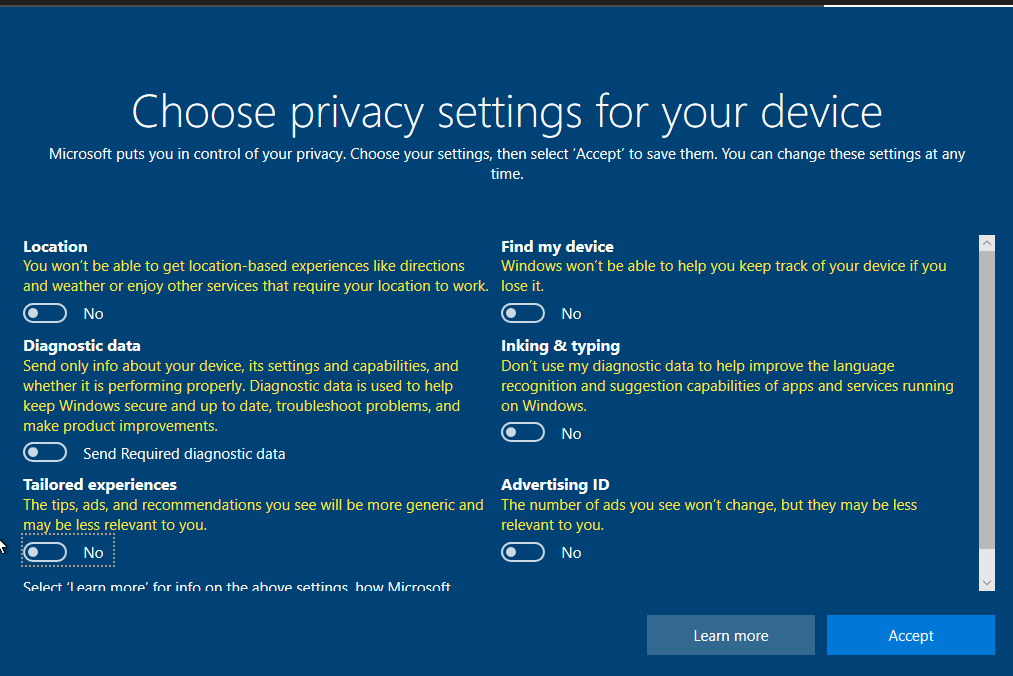
Now we successfully installed the windows 10 PC.
Set a Static IP for the Windows 10 Client
We need this because DHCP is managed by pfSense — but for control and reliability, let’s set a static one.
- Go to
Control Panel→Network and Sharing Center - Click
Change adapter settings - Right-click
Ethernet→Properties - Select
Internet Protocol Version 4 (TCP/IPv4)→Properties - Set:
- IP address:
192.168.10.3 - Subnet mask:
255.255.255.0 - Default gateway:
192.168.10.1(pfSense LAN IP) - Preferred DNS:
192.168.10.2(Your Domain Controller’s IP)
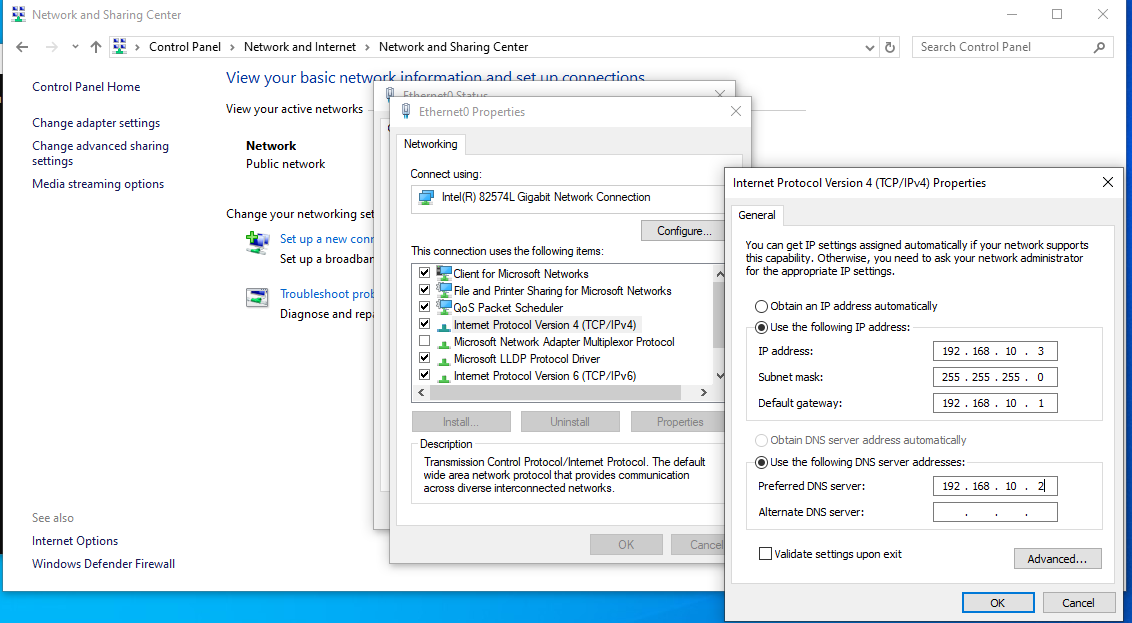
- IP address:
- Click OK and close.
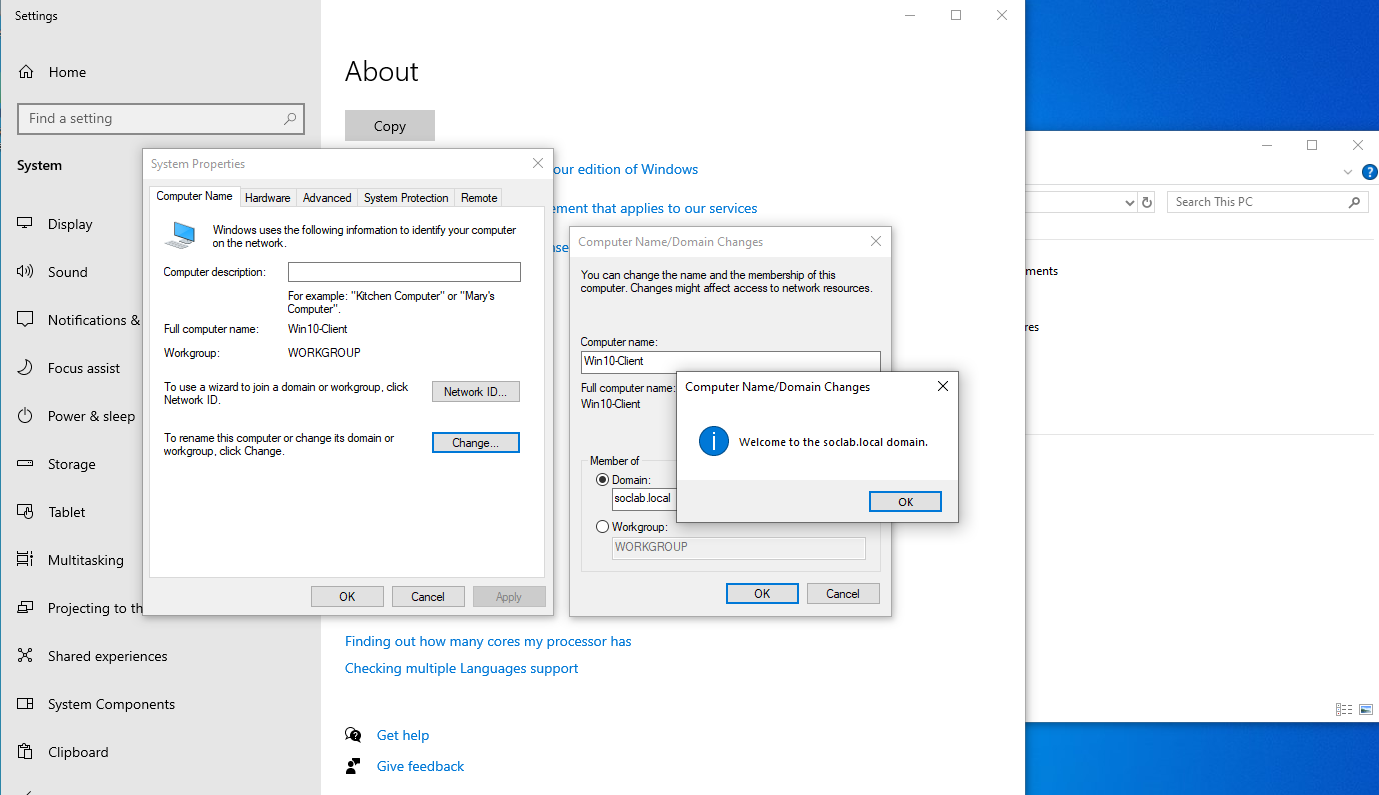
- Join the Domain
Now let’s connect this Windows 10 machine to your Active Directory domain.
- Right-click
This PC→Properties - Click
Rename this PC (advanced) - Click
Change… - Under Member of, select Domain
- Enter your domain (e.g.
soclab.local) - Click OK
- Enter Domain Admin credentials you created during the Domain Controller setup.
- Restart the machine when prompted.
- Create a Domain User for Windows 10 client
- Login to your Windows Server Domain Controller (192.168.10.2):
- Use the domain admin credentials.
- Open Active Directory Users and Computers (ADUC):
- Press
Win + R→ typedsa.msc→ Enter.
- Press
- Create a new User:
- In the left pane, navigate to
soclab.local→ Right-click on Users →New→User.
- In the left pane, navigate to
- Fill in the user details:
- First Name: SOC
- Last Name: User
- User logon name:
socuser@soclab.localor justsocuser
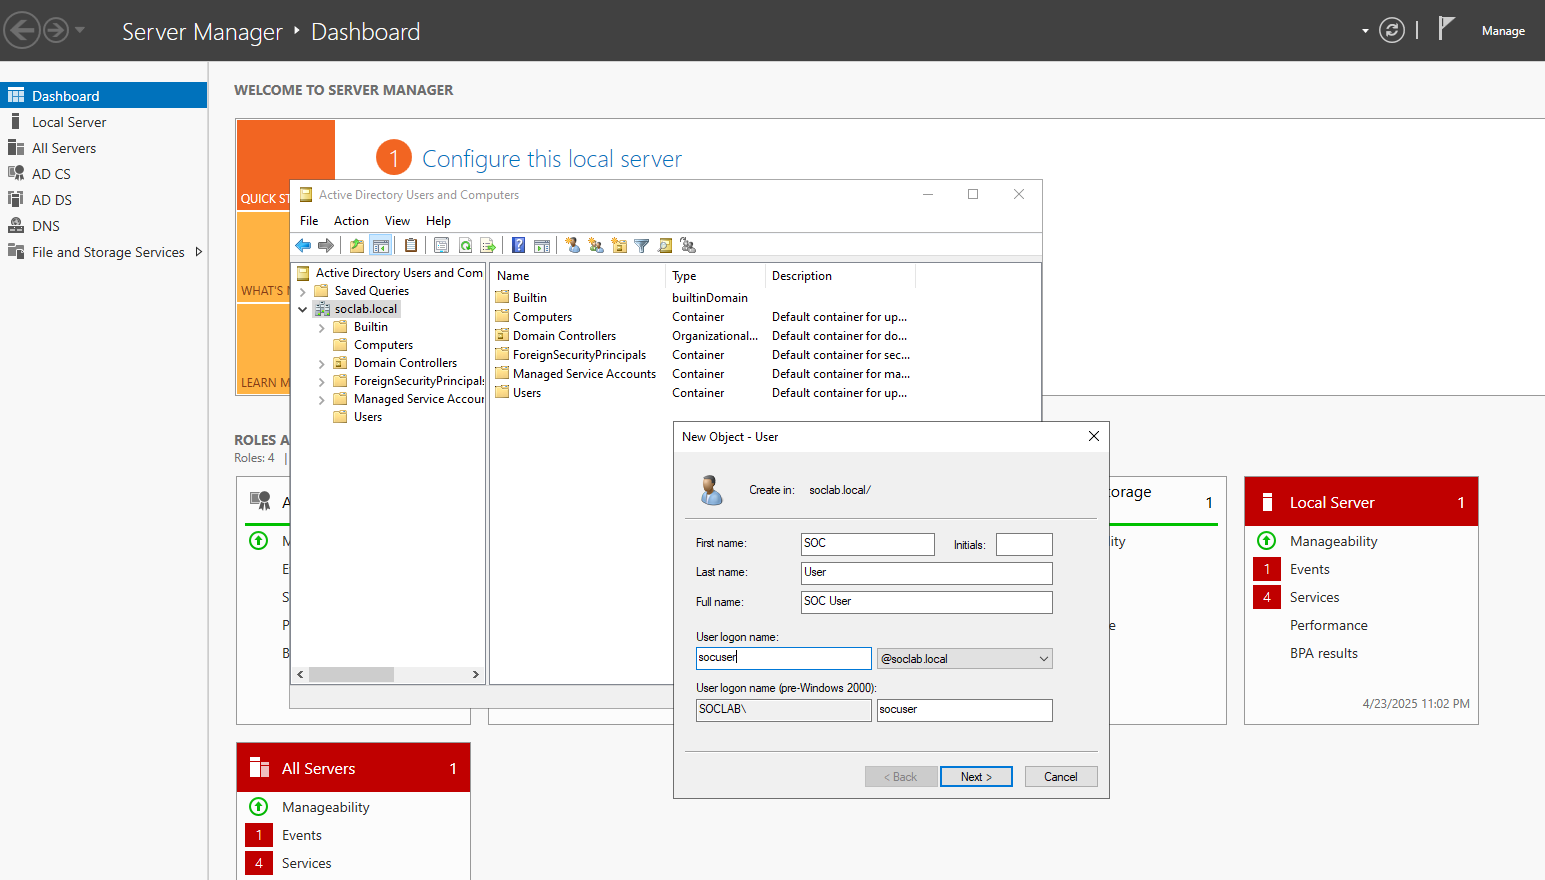
- Click
Next
- Set a password:
- Example:
SocLab@123 - Check:
User must change password at next logon(optional)- Uncheck
User cannot change passwordandPassword never expires(depending on your use case)
- Click
Next→Finish.
- Example:
Now the domain user
socuser@soclab.localis ready! - Login to your Windows Server Domain Controller (192.168.10.2):
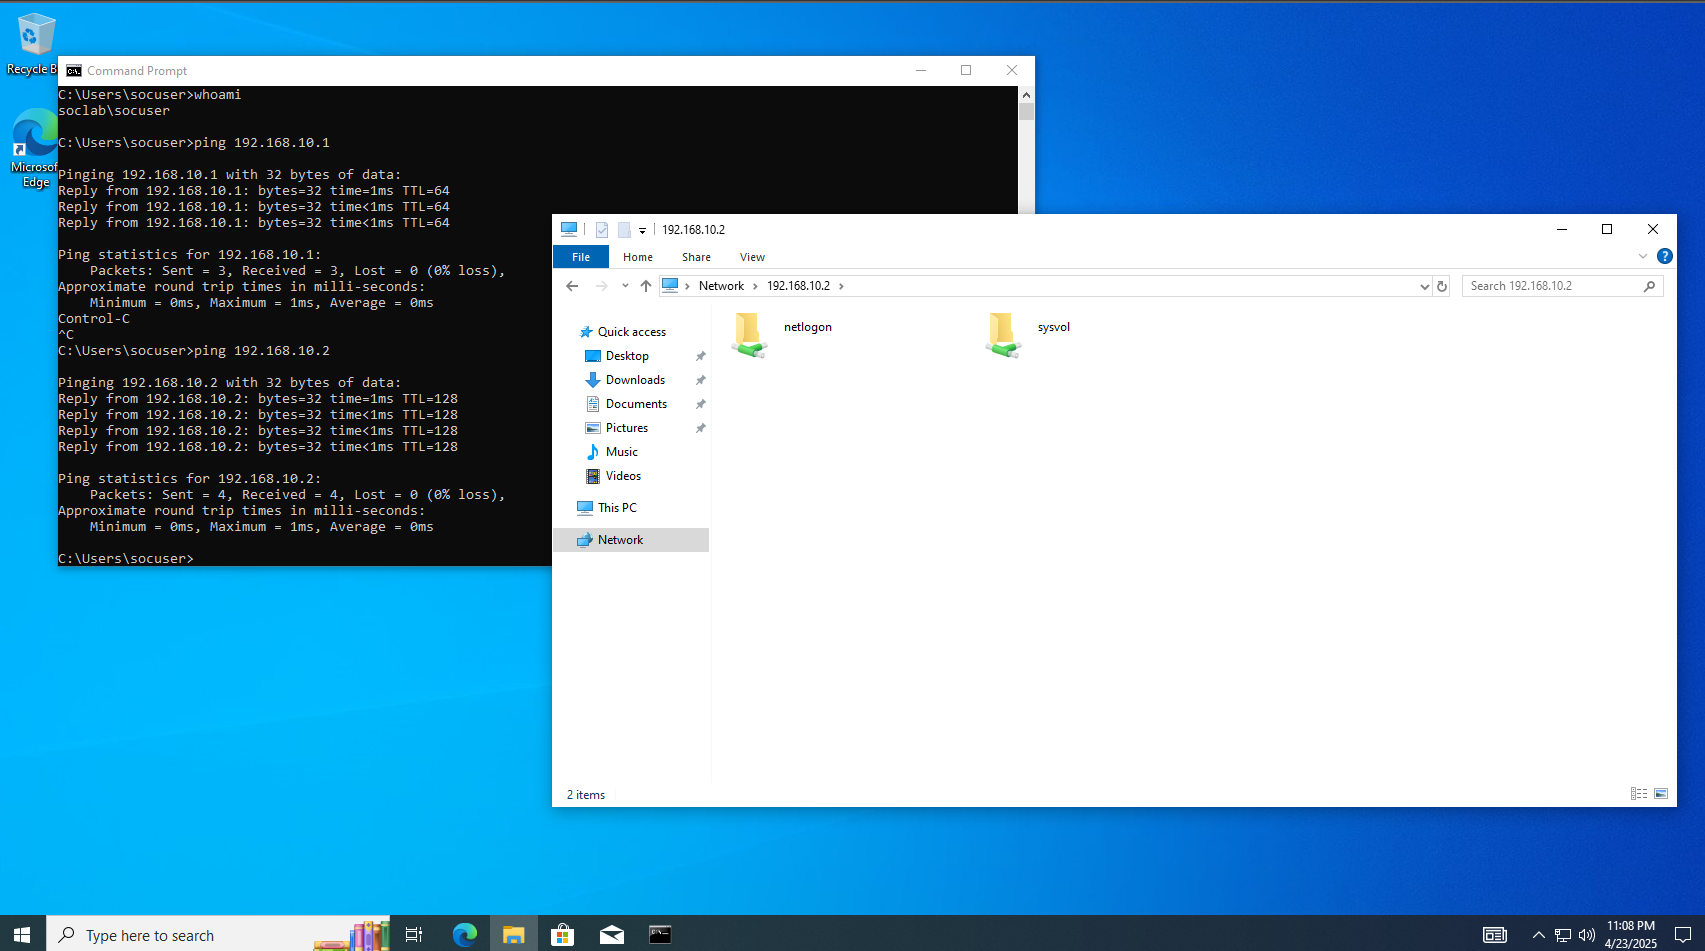
- Test the Domain Connection
- Log in using the domain account:
- Username:
SOC-LAB\socuser - Password you set.
- Username:
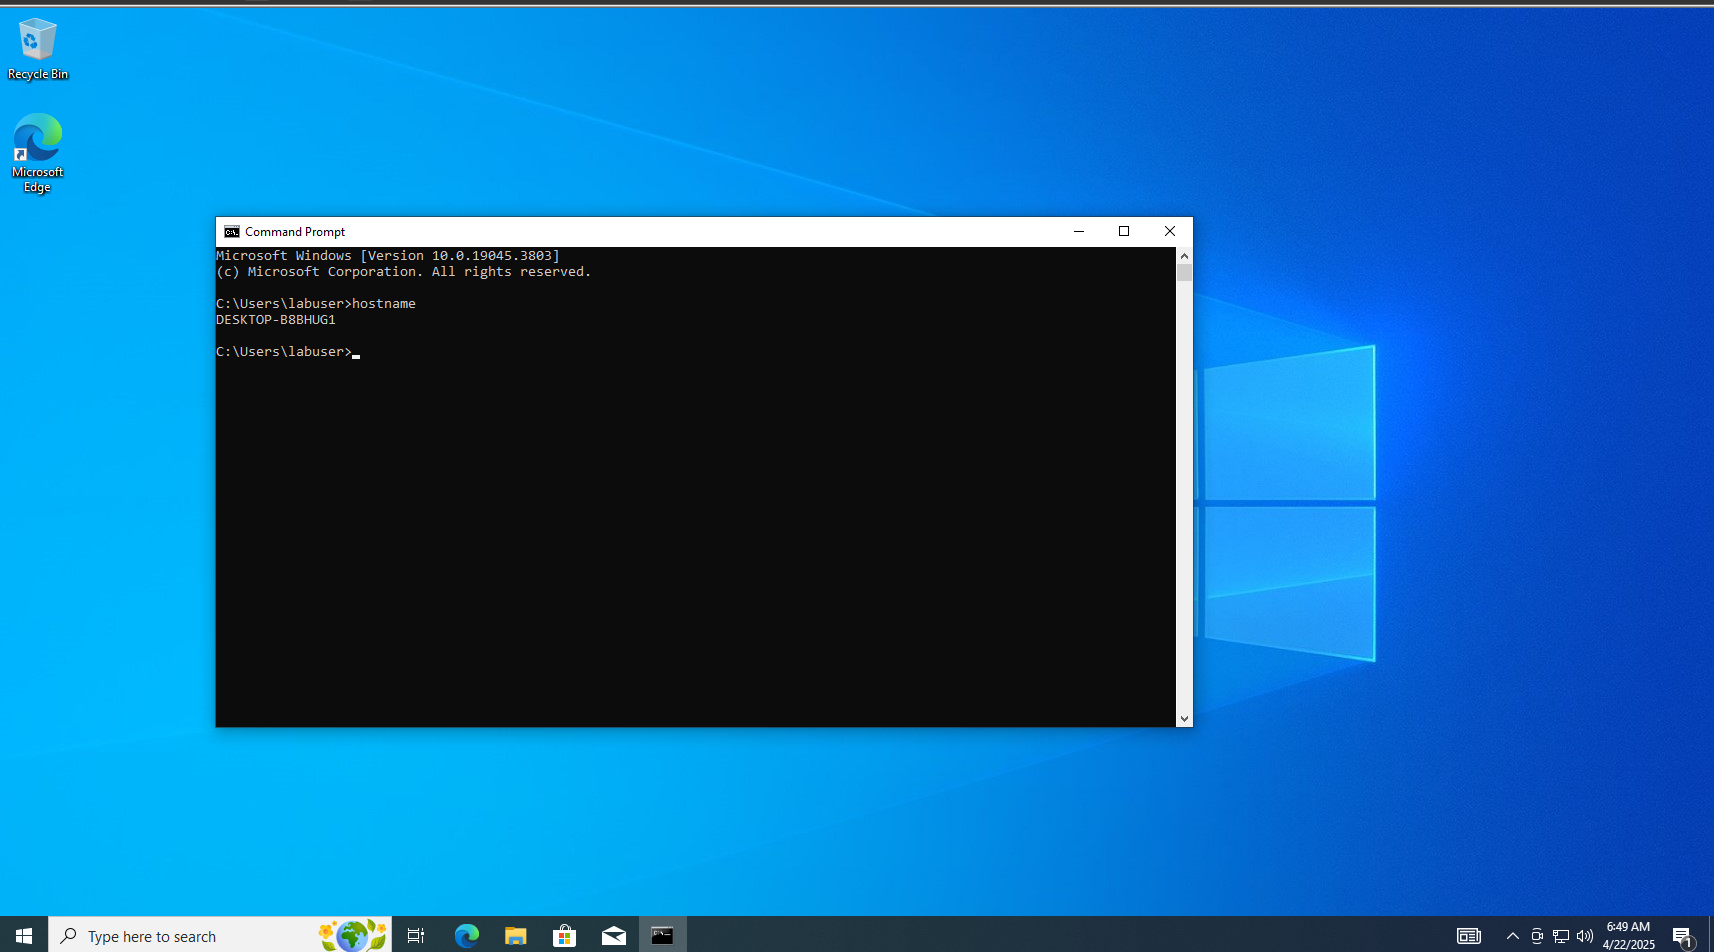
- Test:
- Can you ping
192.168.10.2? - Can you browse
\\192.168.10.2? - Open
Command Promptand runwhoami— it should show your domain.
- Can you ping
- Log in using the domain account:
Alright!!! Lets Wrapping up Part 1
Getting the foundation right?? So thats the solid wrap for the part 1 of our home soc lab build.
So far, we’ve;
1
2
3
4
5
6
- Installed and Configured pfSense with proper network segmentation (LAN,DMZ,SIEM,WAN).
- Set up Windows Server 2022 as a Domain Controller with soclab.local.
- Brought Windows 10 into the domain.
- Created a domain user for our internal client system.
- Installed Kali Linux for red team Simulation.
- Built the foundation of a realistic soc environment step by step.
The lab is alive now and ready for action.
Up Next: PART2-VPN Tunneling,Firewall Rules,Monitoring and Attacks
In Part 2, We will take it to the next level:
- Configure OpenVPN on pfSense with Active Directory authentication so domain users can connect securely.
- Configure pfSense Firewall rules for all the interface we created.
- Deploy Metasploitable 2 in the DMZ for the attack Simulation
- Install and Configure Splunk SIEM to start collecting and Visualizing logs from across the environment.
- Setup Sysmon on Windows machines to generate detailed event logs for process creation,network connections and more.
We’ll now begin to bring the blue team online — collecting, analyzing, and responding to real attack footprints in a secure and segmented lab environment.
Get ready for the action — Part 2 is where the hunt begins.
Happy Hacking